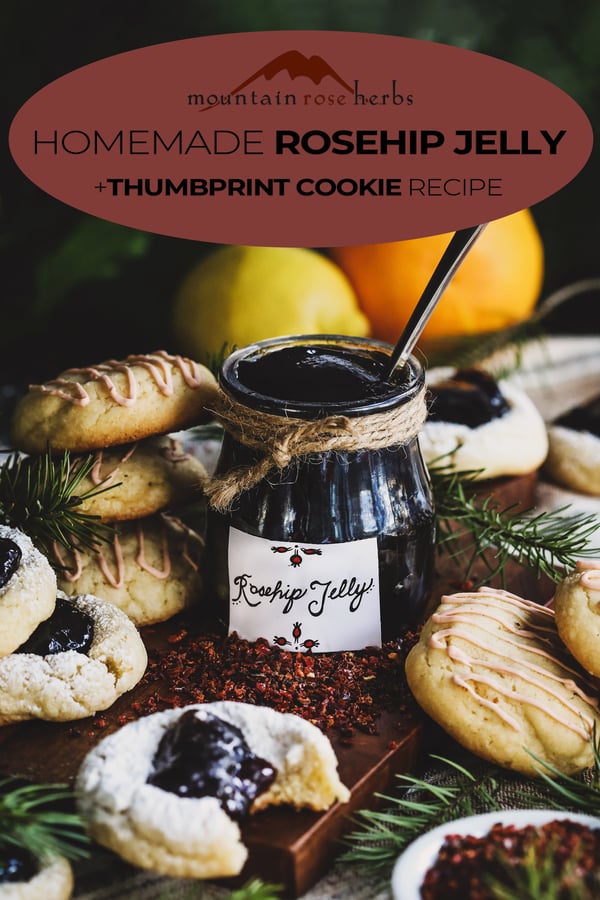
I love rosehips. I love the way they look on rose shrubs and how they remain bright points of color as the gray of winter approaches. I love how they feed wildlife when it’s cold. I love the nutritional and healthful gifts they offer. And I particularly love how those tart little hips are perfect for jellies, jams, and syrups. I don’t always have time in the fall to harvest and clean fresh hips, so I am always grateful for dried rosehips when winter finally arrives and I can slow down and do some cold weather nesting. Now I have the time to pull luscious dried rosehips from my apothecary closet to make rosehip jelly for my family. However, said family firmly believes that rosehip jelly season also means cookie season, because homemade jellies and jams are the best for thumbprint and/or frosted sugar cookies.
What are Rosehips?
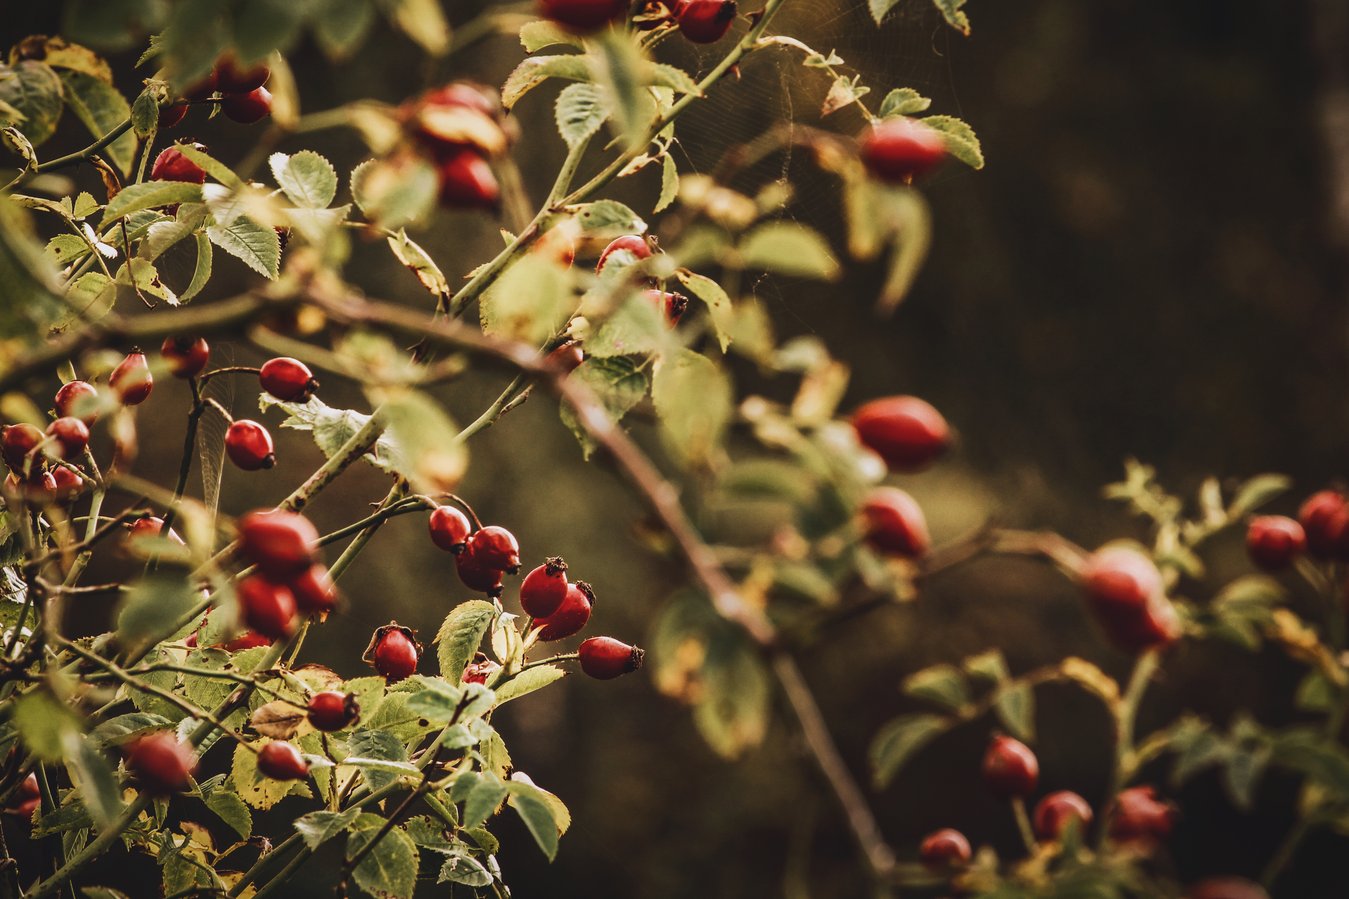
Rosehips—which is also often spelled as two words: rose hips—are the fruits of roses (also called the rose haw or hep). All varieties of roses produce hips, but the Rosa rugosa varieties like Rosa canina and Rosa rubiginosa tend to have larger hips and more of them, so those are the ones that are most often collected for sale and drying. Rose blossoms that are not picked from a plant will finish their flowering cycle and develop a very firm, round or oblong, red or orange hip that appears as the flowers drop off. The hips then develop through the summer into the autumn.
The hip contains rose seeds, but also a plethora of hairs that are incredibly irritating to the mouth and intestines if you eat them. These hairs are, in fact, itching powder! So, if you go foraging for wild rosehips, don’t pop one in your mouth and chew it! If you’re making rosehip tea, you can leave them whole and, thus, avoid the hairs. But, in general, if you’re going to open the hip, you need to get rid of those hairs. This involves removing the ends of the hip, then cutting it in half and scraping out the hairs and seeds, and finally rinsing to make sure every hair is washed away. At that point, the hips are ready for use or drying.

Benefits of Rosehips
Rosehips are a concentrated source of antioxidants like vitamin C. So much in fact that during World War II, when people in Britain couldn’t get citrus fruits, the British government set up a program to pay children 3d (pence) per pound of collected rosehips, which was then used to make rose hip syrup and was distributed as a homegrown source of much needed vitamin C. For millennia, people have made teas, decoctions, and syrups with them to support the immune system and soothe irritated throats and other symptoms that come with typical winter sniffles. Today people take rosehips as a natural way to get vitamins C, E, and K.
Rosehips are also an age-old food source around the world. They can be eaten fresh (after getting rid of those hairs), and can be cooked, juiced, roasted, or dried for storage. In places like Canada and Alaska with frigid winters, first nations peoples would freeze the hips for later use. People also mix them with food to enhance flavor in soups, teas, and desserts. For example, there is a Middle Eastern doughnut that is traditionally drizzled with rose hip syrup, and nyponsoppa is a traditional Swedish rose hip soup.
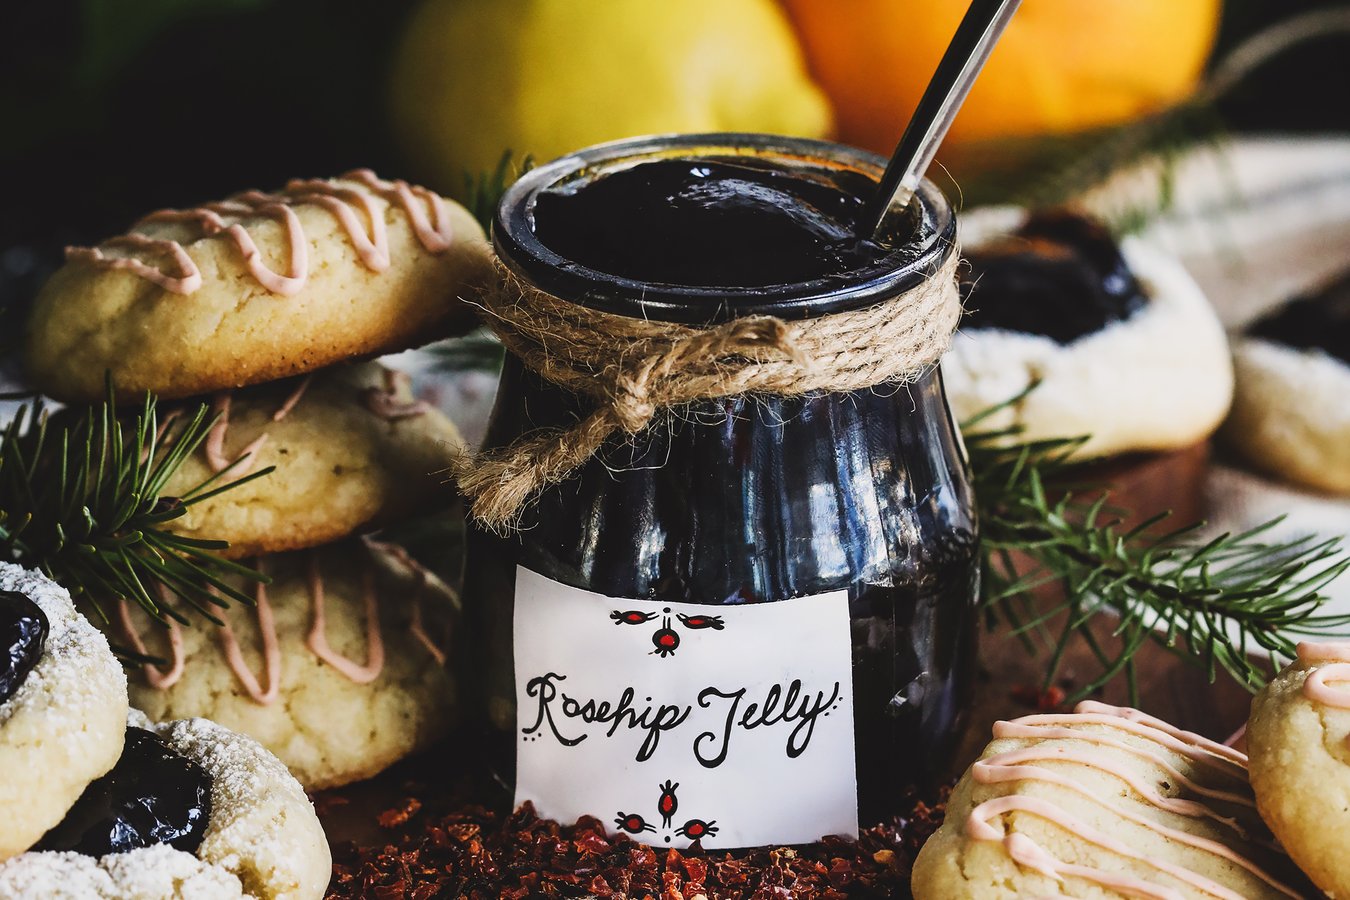
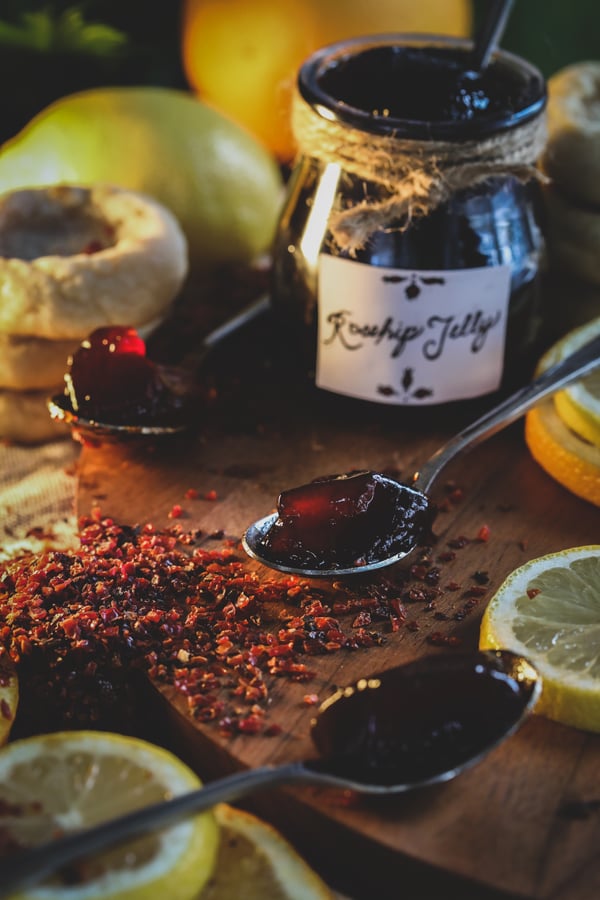
Because rose hips are naturally tart, they are particularly wonderful in jellies, jams, and syrups in which a sweetener is added. Rose hip jam recipes exist from as early as the 18th century. Dried rose hips work well for this task and open up the option to do a little mid-winter jelly making!
Rosehip Jelly Recipe Made With Dried Rosehips + Canning Directions
Makes about 6 1/2-pint jars of jelly.
Ingredients
- About 5-6 oz. (by weight) fresh unpeeled organic orange—I used 3 Clementines/tangerines
- 1 lb. dried organic rosehips
- 8 cups water + more if necessary
- 3 1/2 cups organic sugar
- 1/2 cup lemon juice
- 1.75-oz. package of dry pectin
- 1/4 tsp. butter (optional)
Directions
- Cut orange with peel into several pieces. Combine orange chunks with rosehips and 8 cups water in a stainless steel or other non-reactive pot (not cast iron or aluminum).
- Cover pot, bring to a boil over medium heat. Lower heat and simmer 10-15 minutes, stirring occasionally, until very soft.
- Mash mixture a bit with a potato masher to break up oranges. Cover again and set aside to steep for 30 minutes.
- Strain through a fine mesh sieve or a jelly bag, using a rubber spatula to turn the pulp as necessary to encourage draining. Juice thickens as it cools, so may take 30 minutes or more to fully drain. You ultimately want 3 cups of juice. If necessary, dump pulp back in the pot, pour in 1 cup water, cover and bring back to a simmer for 10 minutes, remove from heat and set aside to steep for another 15 minutes, then strain again.
- Meanwhile, thoroughly wash 6 half-pint jars and canning lids in hot, soapy water and rinse well. Put jars on a baking pan in the oven at 250 degrees to sterilize.
- Place lids on a towel rubber-side up and set aside with canning rings.
- Measure out sugar. Set aside.
- Combine 3 cups rosehip juice with lemon juice and the box of pectin in a pot. Bring to a boil over medium-high heat, stirring regularly, to dissolve pectin.
- Add pre-measured sugar. Stir to dissolve.
- When dissolved, add optional bit of butter to keep the mixture from foaming too much.
- Stirring constantly, bring to a full "hard" boil (one you cannot stir down) and boil at that rate for exactly one minute.
- Remove from heat, skim off any foam on top.
- Ladle into hot jars, leaving 1/2 inch room at the top. Wipe rims with clean damp cloth to ensure a good seal.
- If not canning, let jelly cool in open jars to room temperature, then place on lids and rings and put in the refrigerator overnight before using. Un-canned jelly will be shelf stable for up to three weeks in the refrigerator.
- If canning, put on lids and rings.
- Water bath can for 10 minutes in accordance with the USDA recommendations for your altitude.
- Turn off heat, remove lid from canner and prepare a towel on the counter where jars can sit undisturbed for 24 hours. Remove jars from canner and put on towel.
- The next day check each jar to ensure proper seal. Unsealed jars should be refrigerated and used within the month.
- When opened, canned jelly will keep for up to 6 months in refrigerator.
Pro Tip: If you have never canned before, please work with an experienced canner or check with your local extension service to ensure you are following all the safety precautions before you start.
Ways to Use Rosehip Jelly
- As jelly on all the things that jelly is wonderful for!
- As a glaze on baked proteins or fruits
- On cheese and charcuterie boards
- As a sandwich spread
- In jam-based cookies and cakes
Vintage Sugar Cookie Recipe with Rosehip Jelly Options
These sugar cookies are the first cookies I ever made solo as a child, and they still stand the test of time. The recipe is from a 1963 kids cookbook called Betty Crocker's Cooky Book. As the title implies, this is a very kid-friendly recipe. I did make a change for better flavor—I use unsalted butter and then add salt. To go with the original, use salted butter and eliminate the salt.
Ingredients
- 1 1/2 cups organic powdered sugar (make your own, see pro tips)
- 1 cup unsalted butter or non-dairy butter, softened
- 1 tsp. vanilla extract (make your own)
- 1/2 tsp. almond extract
- 1 egg or approximately 2 flax eggs
- 2 1/2 cups organic all-purpose flour or gluten-free one-for-one type flour
- 1/2 tsp. fine sea salt
- 1 tsp. baking soda
- 1 tsp. cream of tartar

Directions
- Beat powdered sugar with softened butter or butter substitute, vanilla extract, almond extract, and egg or flax eggs until well blended.
- Thoroughly stir in flour (regular or gluten-free), salt, baking soda, and cream of tartar.
- Divide dough in half and put in airtight containers in the refrigerator. Refrigerate at least 2 hours and up to 2 days before using.
- When ready to bake, use a #40 cookie scoop or a spoon to measure out 1 to 1 1/2 Tbsp. of dough. Roll into a ball. Repeat with remaining dough. Put balls back in refrigerator for 15-20 minutes.
- Preheat oven to 350°F and line baking sheets with parchment or silicone baking mat (don’t grease).
- Put dough balls straight from refrigerator 2 inches apart on lined baking sheet. Bake 7 minutes, turn pan 180 degrees, bake another 5 minutes or until edges are just lightly browned.
- Regular sugar cookies with rosehip jelly frosting: Put hot pan on cooling rack for about 5 minutes, then remove cookies to cooling rack and let cool completely before frosting. Add rosehip jelly to frosting.
- Rose hip thumbprint cookies: When pan comes out of oven, use a spoon, the round end of a spatula, or other kitchen tool to gently press a round indention (thumbprint) into the top-middle of each hot cookie. Put pan on cooling rack for about 5 minutes, then remove cookies to cooling rack and let cool completely. Fill “thumbprint” with jelly.
Pro Tips
- Want a snickerdoodle-style sugar cookie? Roll the unbaked dough balls in a mix of 4-5 parts sugar to 1 part cinnamon before baking!
- Make your own powdered sugar! If you have a powerful blender, you can blend organic granulated sugar and easily make your own organic powdered sugar. No more having to buy and store a separate kind of sugar!
- You may need more than one flax egg to replace regular egg. A flax egg can be made with 1 Tbsp. flaxseed meal mixed with 2 1/2 Tbsp. water. Let rest about 5 minutes to thicken before using.
- This sugar cookie dough also makes good cut-out cookies. Roll about 1/4” thick and cut into shapes with cookie cutters of choice. Line baking pan with parchment or silicone baking mat (don’t grease the pan). Bake at 375°F until edges are light brown. Cool on pan for a minute or so and move to cooling rack to cool completely before decorating.
Want a Pectin-Free Rosehip Jam Recipe?
Try Classic Rosehip Jam!
You may also enjoy:
- DIY Rosehip Face Moisturizer for a Radiant Complexion
- 6 Unique Cookie Recipes to “Win” Your Cookie Exchange
- Herbal Holiday Crafts for Kids