Pinwheel Cookies with Herbal Powders (4 Ways)

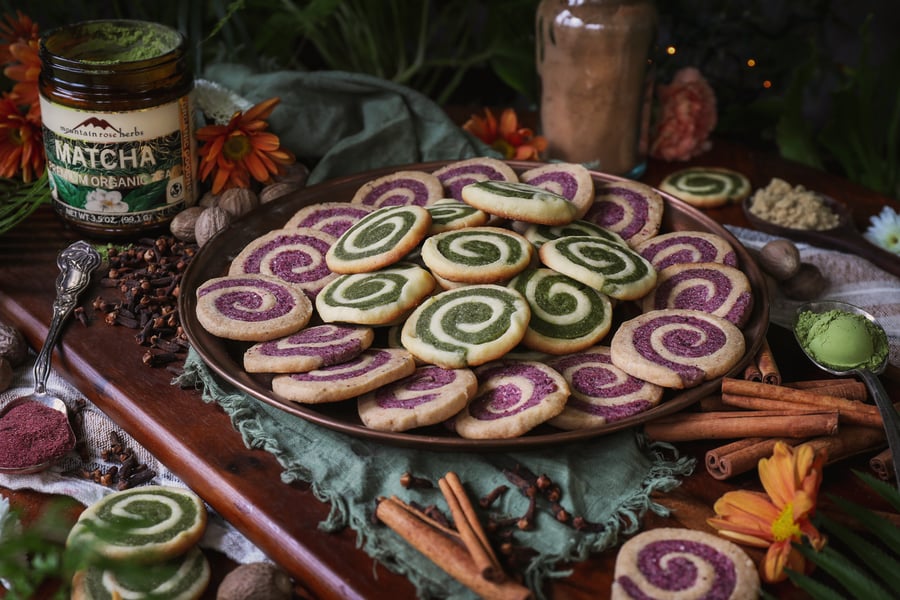
Pinwheel cookies lay out on a plate

Pinwheel cookies (also called spiral cookies) have been a holiday tradition for decades. Often made with vanilla and chocolate or red and green food color, they show up on cookie plates throughout the season. I like traditions like this… and I also like to see how far I can push those traditional recipes to accommodate more flavors and spices.

This classic “icebox” cookie recipe (modern world translation: refrigerator cookie) is essentially the same one my great grandmother—and thousands of other people—used to make in the 1930s and it’s remained a standard ever since. It’s a dough you can easily change into a variety of different cookies with small additions like spices, nuts, dried fruit, crushed candies, etc. And it’s also an accommodating dough for rolling and cutting. These two qualities make it an ideal choice for delicious pinwheel cookies infused with herbal powders!

Herbal powders not only bring botanical goodness and wonderful flavors to your baking endeavors, they also add color, which is perfect for making pinwheel and checkerboard cookies. Want red and green? Try matcha and hibiscus powders. Or improve the old-school cocoa and vanilla option with roasted cacao powder and a warming spice blend. Mix and match to your heart’s content!

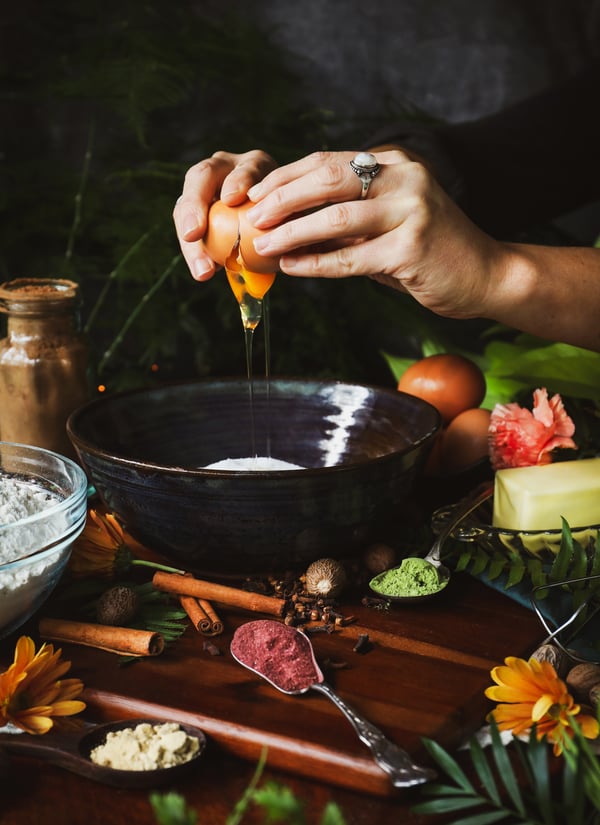
An egg is cracked into a bowl of ingredients

The Basic Icebox Cookie Recipe for Pinwheel Cookies

Makes 75-80 Cookies.

The original recipe from back in the day calls for 1/4 cup more flour. Because we’re adding herbal powders, we want to cut back on the flour a bit. We can work in extra flour as needed at the end.

Ingredients

  • 2 3/4 cups all-purpose flour or 1-to-1 style gluten-free flour
  • 1/2 teaspoon baking powder
  • 1/2 teaspoon salt
  • 1 cup unsalted butter or vegan butter substitute
  • 1 1/3 cups sugar
  • 2 eggs
  • 2 teaspoons vanilla extract
  • Organic herbal powder(s) (see recipes below)
  • Milk or milk alternative

Directions

  1. Whisk together flour, baking powder, and salt. Set aside.
  2. Using a stand mixer or hand mixer, thoroughly cream butter on medium-high speed. 
  3. Add sugar and continue to mix on medium-high until light and fluffy. 
  4. Turn mixer to medium and add the eggs one at a time, mixing well after each addition.
  5. Mix in the vanilla.
  6. Turn your mixer to low and add the dry ingredients. Mix just until well combined. Alternatively, you can do this by hand with a good wooden spoon or rubber spatula.
  7. Take out half the dough and set aside. Add one kind of herbal powder or powder blend to the dough in the bowl and blend on low to thoroughly incorporate. If using 1-2 Tbsp. of herbal powders, add 1 tsp. milk or milk alternative. The dough may be a little sticky, but that is going to fix itself in the refrigerator and as you roll out the dough in the next steps. However, if it is really sticky, add a little more flour, one tablespoon at a time, just so you can easily pick it up and shape it into a disc.
  8. If your colors aren't uniform through the dough, you can knead it between your hands a bit to more thoroughly distribute the herbal powder.
  9. Pat the dough into a disc and wrap tightly in parchment paper, beeswax wrap, or plastic wrap. This is also a great place to re-use plastic bags, but make sure to wrap tightly to keep air out. Put in refrigerator.
  10. Wipe out the mixer bowl and put second half of the cookie dough back in the bowl. Add the second kind of herbal powder or powder blend you want to use and proceed as above.
  11. Let dough discs rest in the refrigerator until completely chilled, 2-3 hours or overnight.
  12. When dough is chilled, take out the disc that you want to be the outside spiral. (You might find it easier to work with half a disc at a time.) Leave the remaining dough in the refrigerator until you’re ready to roll it.
  13. Lightly flour a piece of parchment paper or a cutting board. Alternatively flour a kitchen counter, but using parchment paper or a cutting board will help you move the dough into and out of the refrigerator and parchment may also help you roll the cookie dough logs.
  14. Roll out first dough disc into a rectangle about 1/4-inch thick (err on the side of thinner rather than thicker). Use your hands to help shape the edges into a rectangle. If dough is sticking, add a little more flour. Put back in refrigerator.
  15. Repeat with the second disc (inner spiral), making a similarly sized rectangle, but about 1/2-inch smaller in both directions.
  16. Lay the larger piece of dough (outside spiral) on a piece of parchment or plastic wrap.
  17. Center the shorter piece of dough (inside spiral) on top. Gently fold the bottom dough up over the edges of the inner dough and press together.
  18. If the edges aren't sticking together well, brush very lightly with a bit of milk or milk alternative and press again.
  19. Place a piece of parchment paper on top of the dough stack or very lightly flour your hands and gently press to help the two doughs seal together better.
  20. Remove the top parchment or lightly brush away any remaining flour. Then use the bottom parchment or your hands to roll the dough stack, starting at one of the long sides, into a tight log, gently pressing the dough together as you roll. The first roll or two from the edge that you do may look a bit squished as you press them together but that will be buried in the center of the cookie and you won't notice when they are baked. Keep rolling! If final roll doesn't want to stick to the log, brush very lightly with a bit more milk or milk alternative.
  21. Wrap log tightly in parchment, beeswax wrap, or plastic wrap and put back in the refrigerator. Chill at least 3-4 hours and up to overnight.
  22. When ready to bake, preheat oven to 350° F. 
  23. Line a baking sheet with a silicone mat or parchment paper.
  24. Unwrap the dough log and trim the ends so they look nice. Cut log into 1/4-inch slices. Place slices on prepared baking sheet about 1 inch apart.
  25. Bake 5 minutes, turn baking sheet 180° F and bake until just beginning to brown at the edges, another 3-4 minutes.
  26. Move pan to a cooling rack for a couple minutes, then use a spatula to transfer cookies to rack to cool completely.

Pro Tips: 

  • You can substitute almond extract for the vanilla extract.
  • To keep your pinwheel dough logs from becoming flat on one side, roll the wrapped logs several times as they chill until they are solid enough to hold their shape. Alternatively, set them on end in a jar or drinking glass in the refrigerator.
  • If your pinwheel log has one color that is sticking out beyond the other on your final roll, that's fine. It will still look great when cut and baked.
  • A serrated tomato or bread knife makes cutting the logs into slices easier.
  • If your spirals are separating as you slice the log, you can fix it, don't worry! Gently press the dough spirals back together and feel free to dab on a little milk or milk alternative if necessary. Also, small gaps will most likely fill in as they bake and rise.
  • Baked cookies can be dipped in chocolate glaze with added sprinkles for extra fun.

Organic Herbal Powders for Flavoring and Coloring Cookies

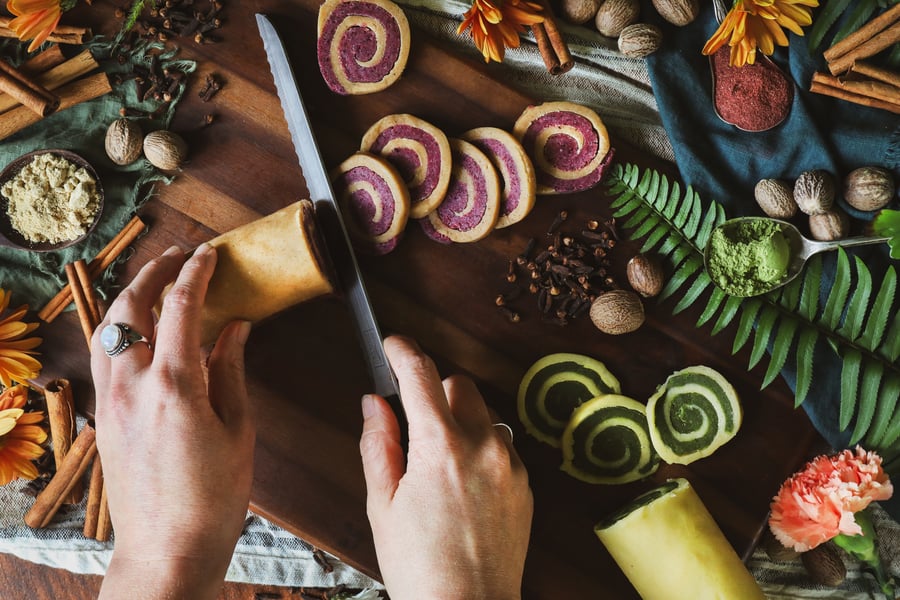
Pinwheel cookie dough is cut into discs

Matcha and Ginger

Ingredients 

Pro Tip: You need this much matcha to achieve ideal green color and flavor, so you will need to add 1 tsp. milk to the dough when blending and may need to brush more milk on the dough as you roll if it seems too dry to meld to the other dough.

Holiday Spice

Ingredients

Hibiscus

Ingredient: 4 tsp. organic hibiscus powder

Pro Tip: Although you don't need to add extra milk to the dough to blend with this amount of hibiscus, you may want to dab more milk on the dough as you roll if it seems too dry to meld to the other dough.

Cacao

Ingredients

Pro Tip: You need this much cacao powder to achieve ideal color and flavor. You will need to add 1 tsp. milk to the dough when blending in the herbal powder and may need to brush more milk on the dough as you roll if it seems too dry to meld into the other dough.


Want another herbal cookie for the holiday cookie tray?

Try Forgotten Cookies with Yaupon Tea

You may also enjoy:

Mountain Rose Herbs PIN photo


Topics: Culinary, Herbal Gift Ideas, Recipes, Herbalism

Heidi

Written by Heidi on November 3, 2023

Heidi is an award winning freelance writer with a passion for urban homesteading. She has been honored to receive a number of literary prizes including the esteemed Pushcart Prize and an Individual Artists Award in Creative Writing from the Oregon Arts Commission and the National Endowment for the Arts. She is proud to have earned a certificate of completion for the Herbal Medicine Making Course at the Chestnut School of Herbal Medicine. When she isn’t working in the garden, cleaning the henhouse, preserving food, crafting herbal formulations, or writing and editing content for really fantastic small businesses, you’ll likely find her with her nose in a book.


WELCOME

We offer one of the most thorough selections of certified organic herbs, spices, and botanical products and are commited to responsible sourcing.

Pinwheel Cookies with Herbal Powders (4 Ways)

Pinwheel cookies lay out on a plate

Pinwheel cookies (also called spiral cookies) have been a holiday tradition for decades. Often made with vanilla and chocolate or red and green food color, they show up on cookie plates throughout the season. I like traditions like this… and I also like to see how far I can push those traditional recipes to accommodate more flavors and spices.

This classic “icebox” cookie recipe (modern world translation: refrigerator cookie) is essentially the same one my great grandmother—and thousands of other people—used to make in the 1930s and it’s remained a standard ever since. It’s a dough you can easily change into a variety of different cookies with small additions like spices, nuts, dried fruit, crushed candies, etc. And it’s also an accommodating dough for rolling and cutting. These two qualities make it an ideal choice for delicious pinwheel cookies infused with herbal powders!

Herbal powders not only bring botanical goodness and wonderful flavors to your baking endeavors, they also add color, which is perfect for making pinwheel and checkerboard cookies. Want red and green? Try matcha and hibiscus powders. Or improve the old-school cocoa and vanilla option with roasted cacao powder and a warming spice blend. Mix and match to your heart’s content!

An egg is cracked into a bowl of ingredients

The Basic Icebox Cookie Recipe for Pinwheel Cookies

Makes 75-80 Cookies.

The original recipe from back in the day calls for 1/4 cup more flour. Because we’re adding herbal powders, we want to cut back on the flour a bit. We can work in extra flour as needed at the end.

Ingredients

  • 2 3/4 cups all-purpose flour or 1-to-1 style gluten-free flour
  • 1/2 teaspoon baking powder
  • 1/2 teaspoon salt
  • 1 cup unsalted butter or vegan butter substitute
  • 1 1/3 cups sugar
  • 2 eggs
  • 2 teaspoons vanilla extract
  • Organic herbal powder(s) (see recipes below)
  • Milk or milk alternative

Directions

  1. Whisk together flour, baking powder, and salt. Set aside.
  2. Using a stand mixer or hand mixer, thoroughly cream butter on medium-high speed. 
  3. Add sugar and continue to mix on medium-high until light and fluffy. 
  4. Turn mixer to medium and add the eggs one at a time, mixing well after each addition.
  5. Mix in the vanilla.
  6. Turn your mixer to low and add the dry ingredients. Mix just until well combined. Alternatively, you can do this by hand with a good wooden spoon or rubber spatula.
  7. Take out half the dough and set aside. Add one kind of herbal powder or powder blend to the dough in the bowl and blend on low to thoroughly incorporate. If using 1-2 Tbsp. of herbal powders, add 1 tsp. milk or milk alternative. The dough may be a little sticky, but that is going to fix itself in the refrigerator and as you roll out the dough in the next steps. However, if it is really sticky, add a little more flour, one tablespoon at a time, just so you can easily pick it up and shape it into a disc.
  8. If your colors aren't uniform through the dough, you can knead it between your hands a bit to more thoroughly distribute the herbal powder.
  9. Pat the dough into a disc and wrap tightly in parchment paper, beeswax wrap, or plastic wrap. This is also a great place to re-use plastic bags, but make sure to wrap tightly to keep air out. Put in refrigerator.
  10. Wipe out the mixer bowl and put second half of the cookie dough back in the bowl. Add the second kind of herbal powder or powder blend you want to use and proceed as above.
  11. Let dough discs rest in the refrigerator until completely chilled, 2-3 hours or overnight.
  12. When dough is chilled, take out the disc that you want to be the outside spiral. (You might find it easier to work with half a disc at a time.) Leave the remaining dough in the refrigerator until you’re ready to roll it.
  13. Lightly flour a piece of parchment paper or a cutting board. Alternatively flour a kitchen counter, but using parchment paper or a cutting board will help you move the dough into and out of the refrigerator and parchment may also help you roll the cookie dough logs.
  14. Roll out first dough disc into a rectangle about 1/4-inch thick (err on the side of thinner rather than thicker). Use your hands to help shape the edges into a rectangle. If dough is sticking, add a little more flour. Put back in refrigerator.
  15. Repeat with the second disc (inner spiral), making a similarly sized rectangle, but about 1/2-inch smaller in both directions.
  16. Lay the larger piece of dough (outside spiral) on a piece of parchment or plastic wrap.
  17. Center the shorter piece of dough (inside spiral) on top. Gently fold the bottom dough up over the edges of the inner dough and press together.
  18. If the edges aren't sticking together well, brush very lightly with a bit of milk or milk alternative and press again.
  19. Place a piece of parchment paper on top of the dough stack or very lightly flour your hands and gently press to help the two doughs seal together better.
  20. Remove the top parchment or lightly brush away any remaining flour. Then use the bottom parchment or your hands to roll the dough stack, starting at one of the long sides, into a tight log, gently pressing the dough together as you roll. The first roll or two from the edge that you do may look a bit squished as you press them together but that will be buried in the center of the cookie and you won't notice when they are baked. Keep rolling! If final roll doesn't want to stick to the log, brush very lightly with a bit more milk or milk alternative.
  21. Wrap log tightly in parchment, beeswax wrap, or plastic wrap and put back in the refrigerator. Chill at least 3-4 hours and up to overnight.
  22. When ready to bake, preheat oven to 350° F. 
  23. Line a baking sheet with a silicone mat or parchment paper.
  24. Unwrap the dough log and trim the ends so they look nice. Cut log into 1/4-inch slices. Place slices on prepared baking sheet about 1 inch apart.
  25. Bake 5 minutes, turn baking sheet 180° F and bake until just beginning to brown at the edges, another 3-4 minutes.
  26. Move pan to a cooling rack for a couple minutes, then use a spatula to transfer cookies to rack to cool completely.

Pro Tips: 

  • You can substitute almond extract for the vanilla extract.
  • To keep your pinwheel dough logs from becoming flat on one side, roll the wrapped logs several times as they chill until they are solid enough to hold their shape. Alternatively, set them on end in a jar or drinking glass in the refrigerator.
  • If your pinwheel log has one color that is sticking out beyond the other on your final roll, that's fine. It will still look great when cut and baked.
  • A serrated tomato or bread knife makes cutting the logs into slices easier.
  • If your spirals are separating as you slice the log, you can fix it, don't worry! Gently press the dough spirals back together and feel free to dab on a little milk or milk alternative if necessary. Also, small gaps will most likely fill in as they bake and rise.
  • Baked cookies can be dipped in chocolate glaze with added sprinkles for extra fun.

Organic Herbal Powders for Flavoring and Coloring Cookies

Pinwheel cookie dough is cut into discs

Matcha and Ginger

Ingredients 

Pro Tip: You need this much matcha to achieve ideal green color and flavor, so you will need to add 1 tsp. milk to the dough when blending and may need to brush more milk on the dough as you roll if it seems too dry to meld to the other dough.

Holiday Spice

Ingredients

Hibiscus

Ingredient: 4 tsp. organic hibiscus powder

Pro Tip: Although you don't need to add extra milk to the dough to blend with this amount of hibiscus, you may want to dab more milk on the dough as you roll if it seems too dry to meld to the other dough.

Cacao

Ingredients

Pro Tip: You need this much cacao powder to achieve ideal color and flavor. You will need to add 1 tsp. milk to the dough when blending in the herbal powder and may need to brush more milk on the dough as you roll if it seems too dry to meld into the other dough.


Want another herbal cookie for the holiday cookie tray?

Try Forgotten Cookies with Yaupon Tea

You may also enjoy:

Mountain Rose Herbs PIN photo


Topics: Culinary, Herbal Gift Ideas, Recipes, Herbalism

Heidi

Written by Heidi on November 3, 2023

Heidi is an award winning freelance writer with a passion for urban homesteading. She has been honored to receive a number of literary prizes including the esteemed Pushcart Prize and an Individual Artists Award in Creative Writing from the Oregon Arts Commission and the National Endowment for the Arts. She is proud to have earned a certificate of completion for the Herbal Medicine Making Course at the Chestnut School of Herbal Medicine. When she isn’t working in the garden, cleaning the henhouse, preserving food, crafting herbal formulations, or writing and editing content for really fantastic small businesses, you’ll likely find her with her nose in a book.