Caramel apples have always been one of those mixed-feelings food experiences for me. I love good caramel and I love apples, and when the two things come together in a perfect synergy, it is one of my favorite flavor combinations. Unfortunately, a typical caramel apple falls short. First, the caramel is often too sweet rather than buttery-delicious. Second, I want caramel and apple in every bite, and once I work my way around the caramel-y outside, I’m left with a lot of apple and no more caramel. Finally, I don’t like that I end up with caramel all over my face and in my hair every time I eat a caramel apple on a stick. Recently, however, I found the solution: caramel apple slices! So, of course, down the caramel apple rabbit hole I went and I’m so glad I did!
Caramel-y apple slices fix all the things that I don’t like about caramel apples. They give me total control over the quality of the caramel and the apple-to-caramel ratio, plus I can lay these slices on a plate and eat them with a fork if I want to. It’s caramel apples for adults! And they also give me the option for variety. By creating an assembly line process, I can decorate my caramel apple slices with chocolate, or nuts, or coconut, or berries, etc., and then I can pick and choose. I never have to commit to just one flavor ever again!
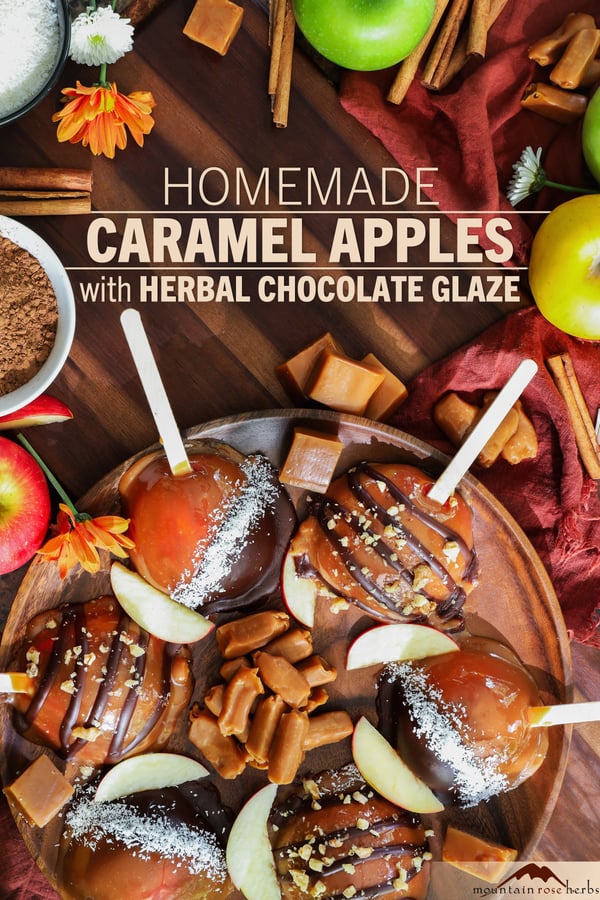
Caramel Apples for Easy Eating
Makes 3-4 caramel apples, sliced.
Even if you choose not to use a stick to eat these apple pieces, the stick does make it easy to maneuver them as you coat them with caramel and toppings. You could also use a fork.
Ingredients
- 3-4 medium crisp, tart organic apples (Granny Smith, Braeburn, Pink Lady, Honeycrisp, etc.)
- Organic lemon juice
- 1/2 lb. homemade cinnamon caramels (see recipe below) or purchase ready-made caramels
- About 1 Tbsp. cream or vegan milk alternative, optional
- Chocolate for decorating, optional (see cacao glaze recipe below)
- Coconut flakes, Cyprus salt, nuts, chopped lycii (goji) berries, etc. for toppings
- Craft sticks, popsicle sticks, or another tool to turn apple slices
Directions
- Thoroughly wash apples. If they are waxed, you need to scrub them with hot water to remove the wax or dip the apples very briefly (about 10 seconds) in boiling water so no waxy residue remains. Caramel won’t stick well to waxed apples.
- Dry apples to fully remove any residue and put in the refrigerator to chill at least several hours, or overnight.
- When you’re ready to make the caramel apples, make room in your refrigerator for a baking sheet. Line baking sheet with parchment paper. Set aside.
- Slice apples into pieces at least 3/4-inch thick (see pro tips). Brush cut sides with lemon juice so they don’t brown.
- If you want an apple on a stick, use a knife to start a hole at the bottom of each slice and push a craft or popsicle stick securely into the slice. If you plan to serve without a stick, skip this step.
- Lay apples cut-side down on the lined pan and put back in refrigerator while you melt the caramels.
- Gently melt caramels in a double boiler or microwave. If you are using store-bought caramels, you will probably need to stir in a little cream or cream alternative; otherwise, the caramel will be too thick. You can also add ground cinnamon to the store-bought ones for an added flavor pop. Homemade caramels may or may not need a little cream to get the proper consistency to stick to the apple. Determine this by patting a slice of apple dry with a dish towel or paper towel (this helps the caramel stick) and dip it into some melted caramel. If the caramel is too heavy and “glops” off, whisk in 1 Tbsp. cream. Re-test with slice of apple.
- Remove apples from refrigerator and use a dish towel or paper towel to pat as dry as possible.
- You can dunk and swirl the apple pieces in the melted caramel as you would a whole apple, but the exposed (sliced) apple flesh doesn’t hold caramel as well as the peel (see pro tip). If you did not put in sticks, use a fork to spear the apple pieces so you have something to hold while you swirl. My daughter-in-law taught me this much more stress-free way to decorate the apples:
-
- Brush a film of caramel on the cut side of the slice to keep it from browning. If you have two cut sides, choose which one is going to be the bottom and brush that side. Lay the brushed side on the parchment paper.
- Now spoon a nice amount of caramel on the top and use the back of the spoon to gently push it over the apple to cover. Repeat as necessary to fully cover. Wipe away caramel that dribbles down to the parchment so you have a clean look around the apple edge. Repeat with all the apples.
- Starting at the first apple again, drizzle a little more caramel over the top of each apple to get a smooth finish and clean up around the apples once more.
- If you want a caramel-only apple, add toppings now while the caramel is still tacky. If you want to add chocolate stripes or dip part of the apple in chocolate, put caramel apples in the refrigerator without adding toppings yet.
- Allow caramel to sit in the refrigerator until fully set and hardened.
- If you want to add chocolate, remove apples from refrigerator, dip or stripe with chocolate, and add other toppings while chocolate is still tacky. Put back in refrigerator.
- When caramel and chocolate have hardened, store apples in an airtight container in the refrigerator for up to 3 days.
- To eat, remove apples from refrigerator and allow to warm somewhat before serving.
Pro Tip: There are several ways you can cut the apples. Just be aware that when the caramel touches apple flesh (as opposed to peel), it will start to “melt.” I prefer to cut the apple away from the core into two pieces, so each piece has one flat cut side and one rounded side with peel. This makes adding the caramel and decorating much easier. You can do this by cutting one side, from the stem down alongside the core, then turn the apple and repeat so you end up with 2 pieces that have a flat cut side and a rounded peel side (plus one core to compost). Save any extra bits to test your caramel. Another option is to slice the apple from the stem down through the core into 3 or 4 slices about 3/4-inch thick so you have an apple shape with two cut sides and a ring of peel around the outside. You will need to dig out the core on each piece; if you can do this without cutting a hole all the way through it, that’s perfect—but it’s okay if you leave a hole in the center so long as you decorate with the apple on the parchment rather than the dip and swirl method. Apples sliced in this manner won’t look as good in the long run because of the caramel-melting problem, so if the aesthetic matters to you, plan to serve within an hour or so.
Let’s Talk Caramel
Just to be clear, you can absolutely purchase caramels to make this recipe. This will save you half an hour of standing at the stove to make caramels, plus their cooling time. Choose the best quality you can find. Also, this time of year in the U.S., excellent homemade caramels are often available at farm stands and farmers markets. That said, I like to make my own because I can add spices like cinnamon, which takes caramel apple slices to a whole new level! Making your own caramels can also be a nice way to just take some time to yourself while you stir the pot and sip at something delicious. You might consider it meditative. Or maybe that’s just the foodie in me talking.

Homemade Cinnamon Caramels with Vegan Options
Makes about 1 1/2 - 1 3/4 lbs. caramels.
This is an old-fashioned (1930s or thereabouts) caramel recipe made with evaporated milk rather than cream. It comes from a time when not everyone had trustworthy refrigeration, so all the ingredients are supremely shelf stable. I like it because it’s deliciously buttery, a little less fussy than making caramels with cream, and also it is easy to substitute ingredients to make these for my vegan friends. I add cinnamon when I’m planning to use these delectable caramels for apples.
Ingredients
- 1/2 cup organic butter or vegan butter alternative
- 2 cups organic sugar
- 1 cup non-GMO organic rice syrup or corn syrup
- 1/4 tsp. organic cinnamon powder
- Pinch sea salt or to taste
- 12 oz. organic evaporated milk or evaporated oat milk
- 1 tsp. organic vanilla extract (make your own!)
Directions
- Lightly grease the bottom of an 8- or 9-inch baking pan (this is to hold parchment paper in place), line pan with parchment paper, and butter the paper bottom and sides. Alternatively, you can butter the pan without parchment paper, but the caramel is hard to get out with that method. Set pan aside.
- In a heavy bottom pot over medium heat, combine butter, sugar, syrup, cinnamon, and salt.
- Using a whisk or a wooden spoon, stir constantly to keep from sticking or burning as the mixture begins to boil. This will take a few minutes. If it seems to be coming to a boil too quickly, turn your heat down a touch.
- Start to slowly add the evaporated milk bit by bit, stirring constantly and making sure to fully incorporate milk before adding the next bit. The mixture should stay at a constant low boil. If you add too much milk at once, the milk can curdle in the hot mixture or you can lose your boil, so just pour in a tablespoon or so at a time and stir it in well, scrape the sides of the pan, add another glug, stir in, etc. It should take at least 5 minutes to add the milk while keeping a nice low boil. Stir constantly..
- I cook the caramel mixture to 243-245° Fahrenheit, but if you want a softer, stickier caramel, you can go as low as 240° F.
- Remove from heat and stir in vanilla extract. Dip a clean spoon in the caramel mixture and set it aside for a few minutes to cool enough to taste test. Adjust salt to taste.
- Pour caramel mixture into prepared pan. Set aside to cool a bit while you clean up. When cool enough to handle the pan, cover with a beeswax or plastic wrap and put in the refrigerator for several hours or overnight to harden. Cold caramels will be hard but will soften at room (or mouth!) temperature.
- To cut, take pan from refrigerator and set out on the counter for a bit. You don’t want them to warm too much or they will be sticky to cut. Use a big knife or a bench scraper to cut into sizes of your choosing and wrap in waxed paper if desired.
- Stored in the refrigerator in an airtight container, caramels will last at least 6 months.
Pro Tip: This type of recipe is where a good instant-read thermometer really helps. If you have a standard glass candy thermometer, they can be a little unreliable sometimes, so you may want to double-check by doing a water test. Drop a bit of hot caramel mixture into a cup of ice water and roll it between your fingers. At 244-245° F, we are aiming for what is called the “firm-ball” stage. It should make a firm but pliable ball. If you’re aiming for a stickier caramel, at 240° F, the ball will be softer and more flexible.
Cacao Glaze Infused with Herbs
Makes about 1 cup.
Want to stripe your apple slices with chocolate? Here’s an easy way to infuse more flavor into your glaze.
Ingredients
- 1/4 - 1/2 tsp. herbs or spices of choice (see ideas below)
- 3-4 Tbsp. boiling water
- 1 cup organic powdered sugar
- 2 Tbsp. organic roasted cacao powder
- Pinch sea salt or to taste
- 2 Tbsp. organic butter or vegan butter alternative
- 1/2 tsp. organic vanilla extract (make your own!)
Directions
- If using whole, hard spices like peppercorns, crush them lightly so they infuse better.
- Pour boiling water over herbs/spices in a cup. Cover with a lid to steep for 10 minutes, or longer if desired for more flavor.
- Meanwhile, whisk together powdered sugar, roasted cacao powder, and salt in a medium bowl. Set aside.
- Strain and reheat infused water so it is very hot.
- Meanwhile, melt butter.
- Whisk together hot water and melted butter and immediately whisk into dry ingredients to create a smooth glaze.
- Whisk in vanilla extract.
- Taste-test and adjust salt to taste.
- Use fairly quickly because chocolate sauce hardens as it cools.
Organic Flavors to Infuse in Chocolate Glaze
- Chai tea
- Chili flakes or smoked chili flakes
- Ginger root
- Lavender flowers
- Lemongrass
- Peppercorns: black, pink, rainbow, or Szechuan
- Saffron
Want a no-sugar caramel apple?
Try this Gourmet Vegan Caramel Apple Bites Recipe!
You may also enjoy:
- Sweet & Spicy Chipotle-Honey Caramel Corn Recipe
- 3 Apple Cider-Inspired Mocktails for Fall
- Rustic Vanilla and Spiced Apple Galette Recipe