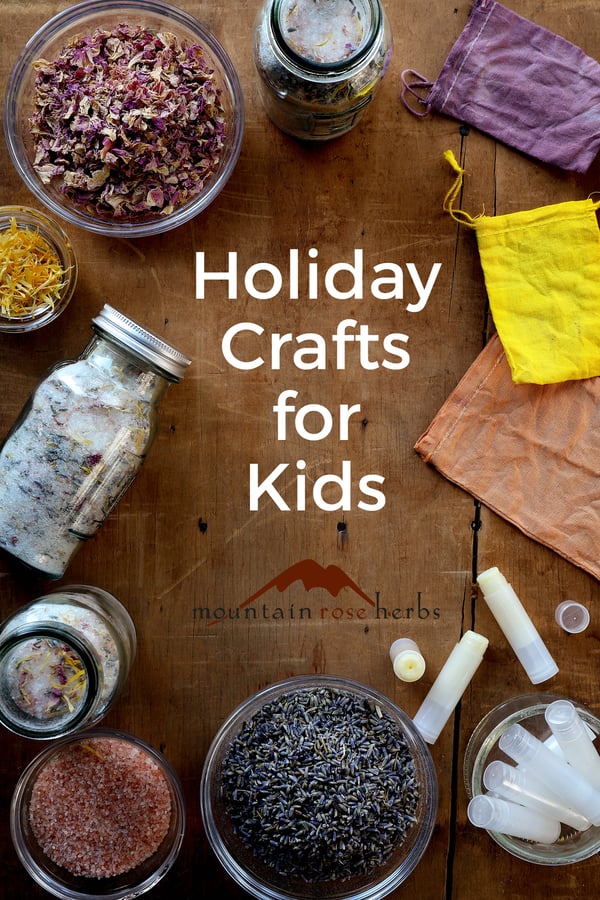
 Looking for holiday gift ideas and activities for at-home kids? Me too! As a mother of a five-year-old I am constantly on the prowl for engaging, fun, and educational activities. After years of teaching nature education, I have found some useful tips to engage kids of all ages, abilities, and group sizes!
I have incorporated an “explore further” section in these recipes to dive deeper into the exciting learning elements that working with natural products can bring. Herbal crafting is an excellent way of providing hands-on education and offers an opportunity to practice a child's fine motor skills. But what makes it all worth while is that kids love the full-sensory experience. These three fun projects are kid tested and well…parent approved!
The keys to successful kid-friendly projects are:
- Make it fun
- Keep it simple
- Allow kids to make mistakes (as always, safety first)
- Embrace the mess!
Here are three fun, educational, and mildly messy recipes!
Herbal Soaking Salts
These soaking salts are perfect for adding to a relaxing bath or for pampering your feet. Herbal soaking salts are a fun gift for kids to give and to learn about self-care.
Supplies
- 5 small bowls
- 1 large mixing bowl
- 1 large mixing spoon
- Serving spoons
- Funnel or roll a piece of paper into a funnel shape (optional)
- Measuring cups
- Label stickers or small squares of paper
- Pens and/or colored pencils
- Non-latex gloves (optional)
Ingredients
- 3-4 cups Epsom salt
- 1 cup Himalayan pink salt
- 1/2 cup baking soda
- 1/4 cup organic pink rose petals
- 1/4 cup organic lavender flowers
- 1/4 cup organic calendula petals
- 4 large cotton muslin bags
- 10-25 drops organic essential oils of your choice: lavender, clary sage, sweet marjoram
- (4) 1/4 kg clear glass storage jars or 4 ½ pint canning jars
Directions
- Lay out all the supplies and ingredients on the table.
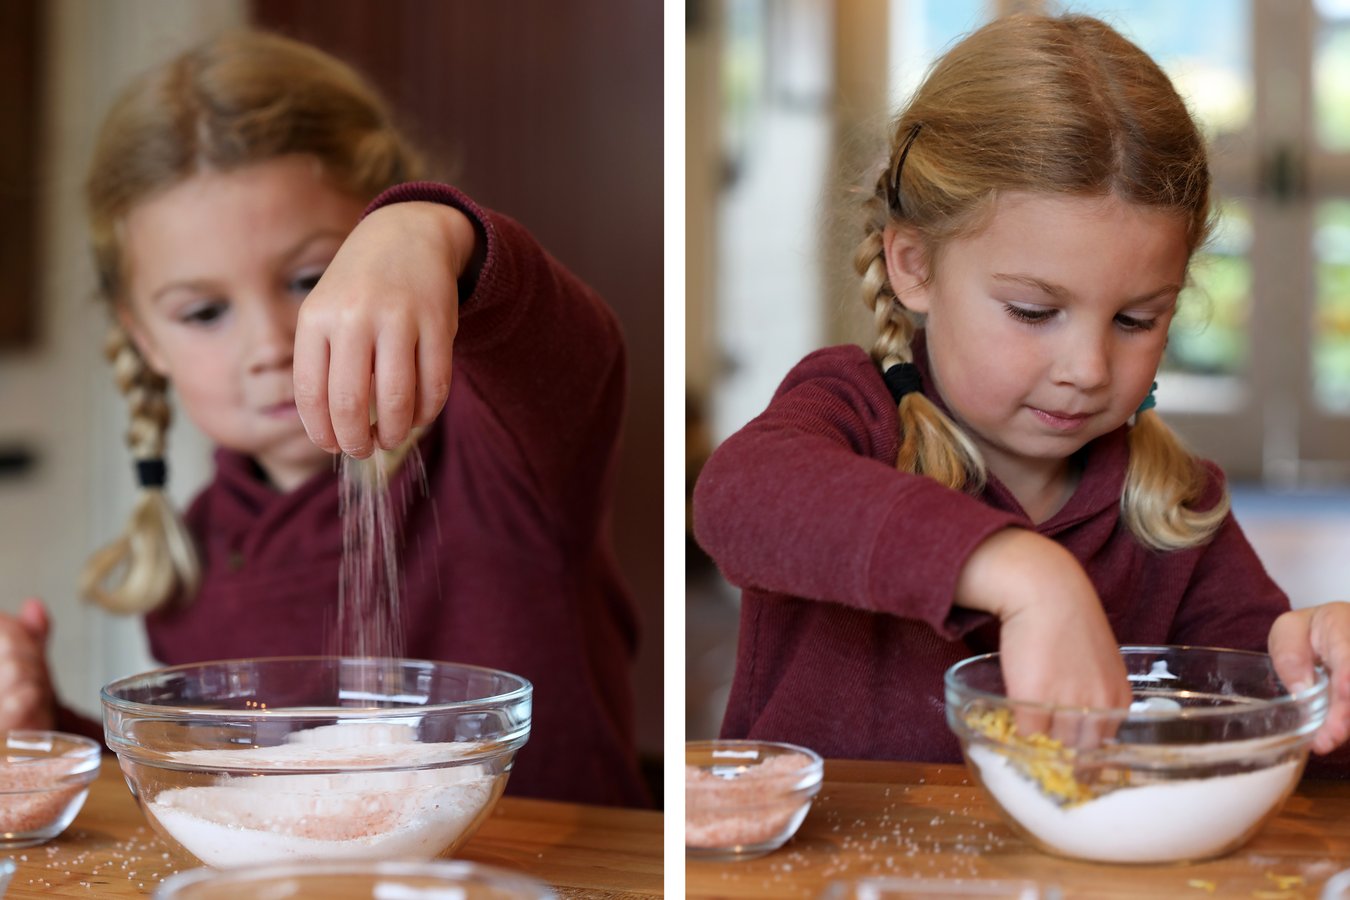
- Begin by helping the kids measure out the Epsom salt, Himalayan pink salt, baking soda, pink rose petals, lavender, calendula petals (let the kids pull the petals off the calendula flower heads so the green parts don’t plug the funnel). Place each ingredient in one of the 5 small bowls.
- Allow the kids to pour each ingredient into the larger mixing bowl and take turns mixing the ingredients with their hands.
- Help the kids add the essential oils to the mixture (wear non-latex gloves if any of the children have skin sensitivities). Depending upon their age and ability level, either have the child add drops of essential oils on their own or help hold the bottle. Together count out each drop.
- Using the large spoon, let each child mix the ingredients once again. (Do not use bare hands!)
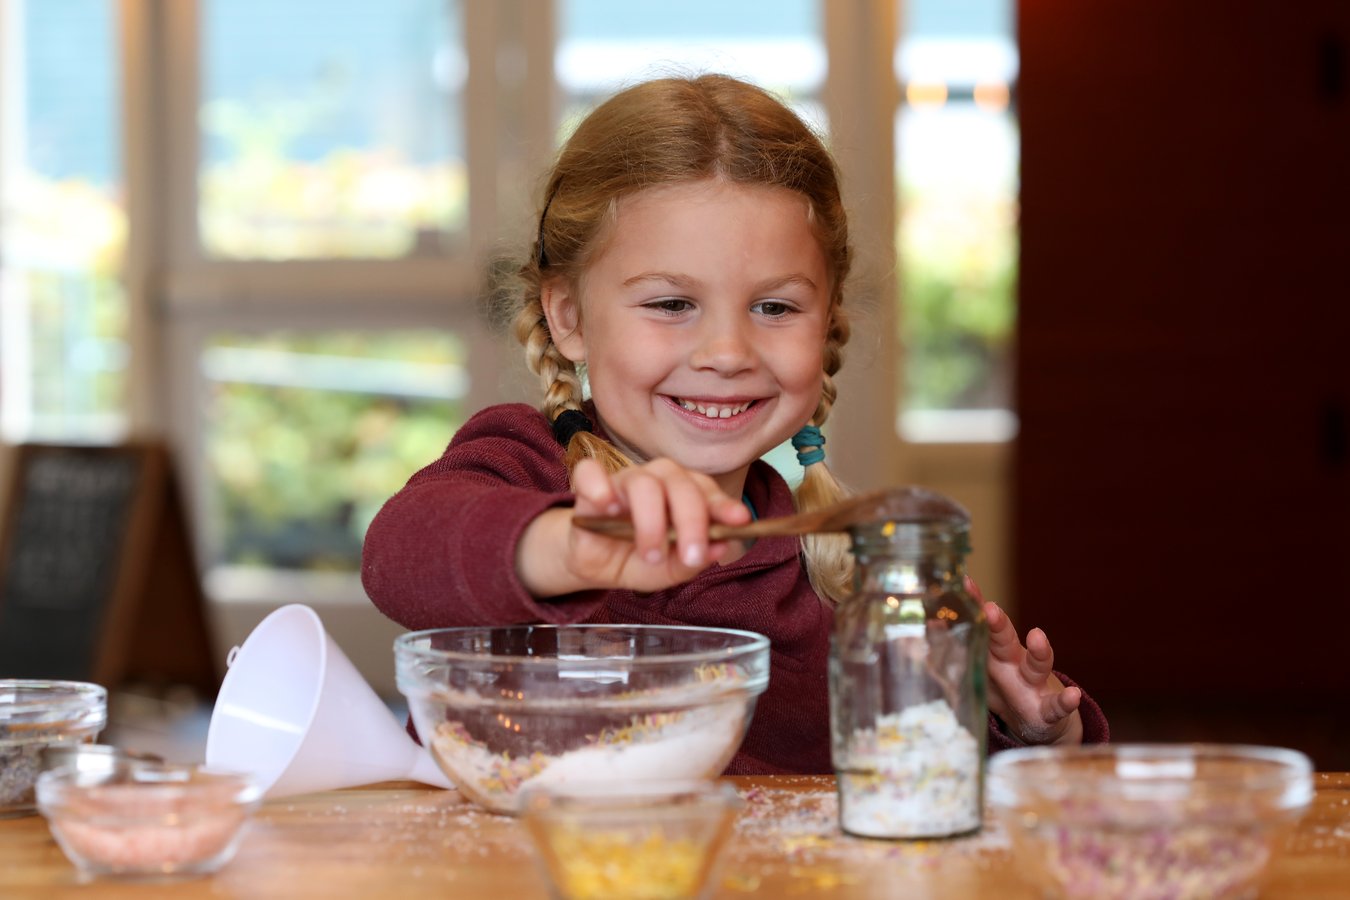
- Give each kid their own glass bottle or jar to fill using a serving spoon. Either take turns with a single funnel or use the paper funnel method so filling can be done at the same time. Younger children may need assistance with this step.
- Cap each bottle and tie the strings of a muslin bag around each bottle neck.
- Make labels or instructional insert. Older children can hand write the name and instructions, and younger children may be encouraged to make a drawing or to add color.
- Instructions on how to use the Herbal Soaking Salts: Pour mixture into muslin bag (1/3-1/4 cup), tie bag closed and drop into bathtub as water is running. After use, wash out bag, dry and reuse!
Explore Further
- Have the kids explore each ingredient. Help them describe texture and color and let them play with, smell, and touch each one. Consider asking questions about the ingredients (how they are made, where they are found, etc.).
- Without naming the essential oils, have the kids smell each bottle and describe what they smell, ask what the scent reminds them of, and then have them guess the plant. Have fun combining scents. Safety tip: Be sure to discuss the safety of essential oils. Avoid touching with bare skin, avoid the eyes, and never ingest. Discuss what essential oils are and how they are made. Learn more here!
Pro Tip
- You can always add more Epsom salt if you are using larger jars.
DIY Naturally Colored Gift Bags
These gift bags are not only fun to make but also add a sweet and personal style to gift giving.
Supplies
- 1 large glass bowl
- 4 large jars (wide mouth quart sized jars are perfect!)
- Measuring cups
- Measuring spoons
- 4 metal serving spoons
- Rubber bands, hair ties, or string (optional)
Ingredients
- 1 cup organic madder root
- 1 cup organic turmeric root powder
- 1 cup organic alkanet root
- 1 cup dried organic elderberries
- 16 cups boiling water
- 4 tablespoons white vinegar
- Large or small cotton muslin bags
Directions
The night before:
- Have the kids add the cotton muslin bags to a large glass bowl and fill bowl with cool water to soak overnight.
- Boil 16 cups of water (4 cups per jar)
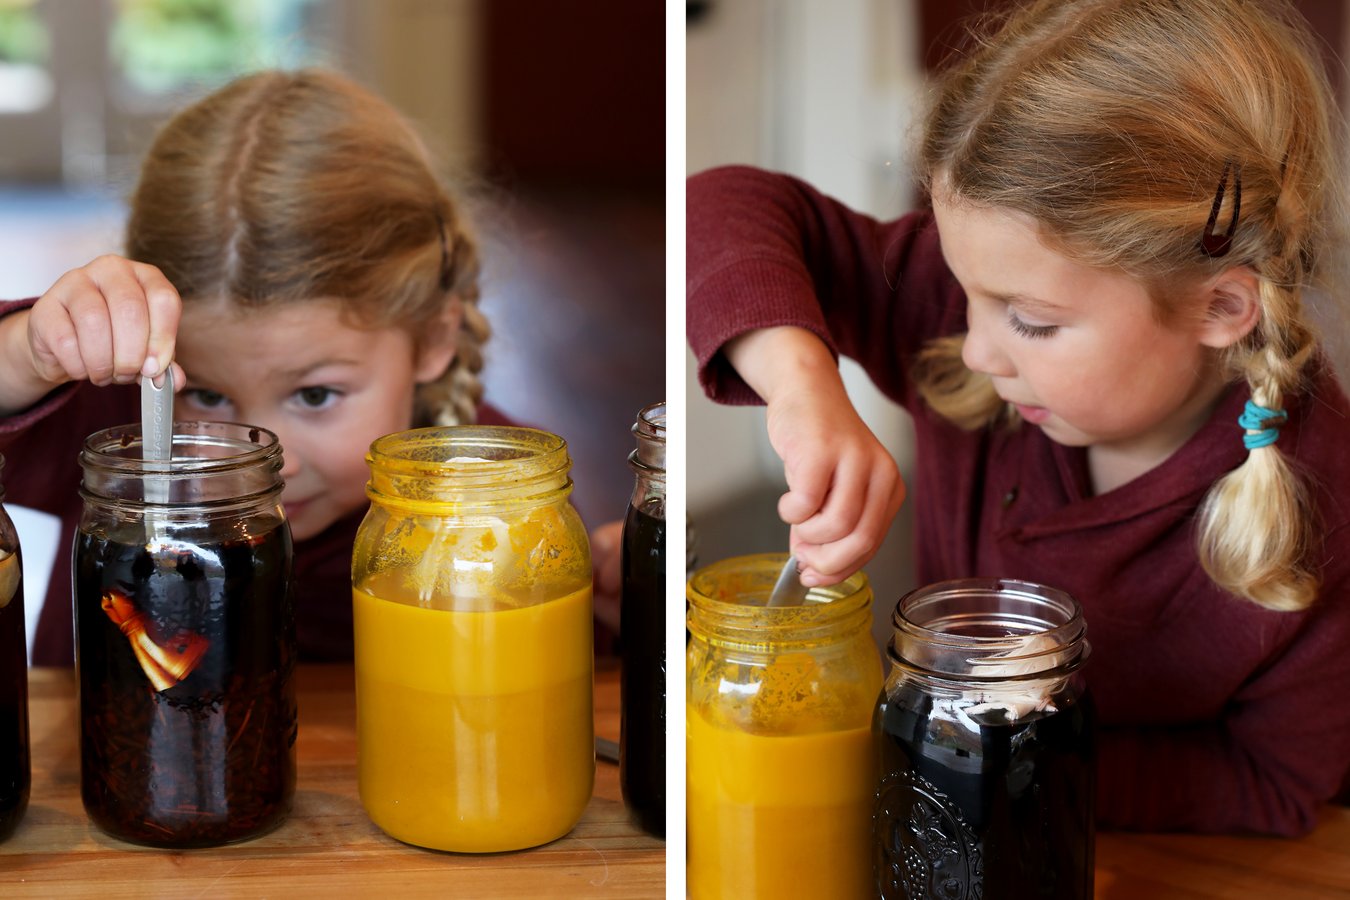
- Lay out the 4 large jars, madder root, turmeric root powder, alkanet root, and elderberries on the counter or table.
- Let the children take turns measuring out 1 cup of each herb and pour into empty jar. There now should be 4 jars filled with 1 cup of each herb.
- Once the water has boiled, assist with pouring the boiling water into each jar. Each jar should have about 4 cups of water each.
- Take turns adding 1 tablespoon of white vinegar to each jar.
- Let the kids take turns stirring the mixtures and let sit overnight.
On the day of craft making:
- Help the kids drain off the water from the bowl with the soaking cotton muslin bags. Feel free to let the kids wring out the bags if they are too drippy.
- Depending on the number of bags you want dyed and/or the number of kids doing the project, divvy out the cotton muslin bags among the children letting each kid have at least one or two of their own.
- Show the children several examples of how they can tie up their bags. For a tie-dye look use the ties to create fun designs. Assist younger children with tying if applicable. Bags can be dyed without tying as well. Give the kids time to discover fun ways on their own to design their ties.
- Once bags are ready, help the kids stick their bags in the desired color and make sure they are completely submerged. I use a metal spoon to hold down the bags.
- Help the kids pull out the bags and lay out to air dry. It is ok to use cold running water to wash out any excess powders or root matter.
- Once dry, iron if necessary and they are ready to go!
Explore Further
- Let the kids fill up the measuring cup and add to the kettle, pot, or electric tea kettle. Teach about cups and ounces as you go.
- Take some time to explore each herb. Have the kids smell, touch, and guess what kind of colors they might turn into. Think of questions to further curiosity: What part of the plant do you think this is? Why are they so colorful? Ask the kids to come with questions as well.
- Experiment. What happens when we take out bags quickly? What about when we leave it in for longer periods? For more of a science-based approach – do timing increments for each color and make a chart of the time spent for each bag and discuss the color changes.
- Play with other plant dyes! Amla (fixative properties), bilberries, usnea, wild indigo root, black walnut hull powder, bloodroot, Oregon grape root, and annatto seed.
Pro Tip
- Warning! Some of these plant dyes can stain clothing, countertops, and wooden utensils. Make sure kids are wearing clothes that can get stained or have aprons available. Use newspaper or other protective coverings for your counters or tabletops.
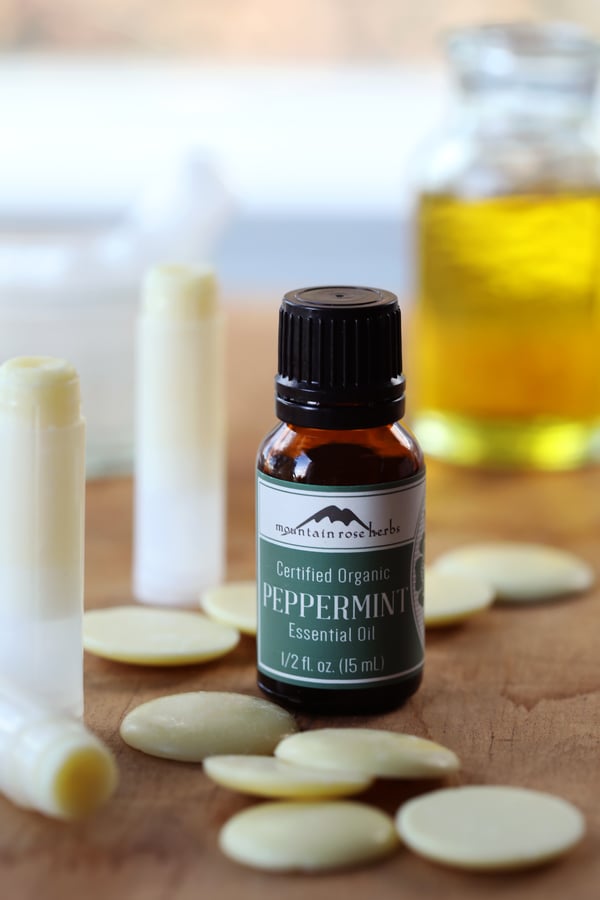
Mint Cocoa Lip Balm
Mint and chocolate are a fun combo that kids love, and mint is such a wonderful holiday scent!
Supplies
- Glass or plastic eye dropper (optional)
- Double boiler (or use a small pot inside a larger one for a make-shift boiler)
- Stirring spoon (metal or wood)
- Label stickers, homemade labels (paper and tape), label template
- Colored pencils or pens if applicable
- Measuring spoons and cups
- 10 clear or white lip balm tubes
- 1 Tbsp. plus 1 tsp. beeswax (pastilles are preferred for ease)
- 2 Tbsp. organic sweet almond oil
- 1 Tbsp. organic avocado oil
- 1 Tbsp. organic cocoa butter (~5 wafers if using cocoa butter wafers)
- 12-15 drops organic peppermint or spearmint essential oil
- A few drops of vitamin E oil (optional, for preservation)
Directions
- Lay out all the ingredients and supplies on the table or counter. Let the kids undo the caps of the lip balms and line up the tubes for when you are ready to add the liquid mixture.
- Have one child put water in the base of the double boiler and set it on the stove over medium high to get the water boiling.
- While water is warming, have kids take turns measuring out the beeswax, sweet almond, oil, avocado oil, and cocoa butter into the top of the double boiler.
- Once melted, remove double boiler from the heat and place the pot on a trivet or hot pad on the counter or table. Help the kids add the peppermint essential oil and vitamin E oil as you count the drops together and stir the mixture.
- Immediately start getting the liquid mixture into the lip balm tubes. The easiest way I have found to do this with children is to use an eye dropper so the kids can have an easier time getting the liquid in the opening. Let each child have a turn filling at least one tube.
- Once the lip balms have hardened let the kids put on the lip balm tube caps. It is important to wait for the balm to be mostly hardened – if caps are put on too early the liquid will splash up into the caps!
- Lastly, make the labels! Either download one of our label templates, purchase label stickers and create your own, or simply use pieces of paper and tape them on the tubes with packing tape! Attach to tubes when lip balm is completely cool. Make sure the kids write at least the name of the lip balm (or help younger children write) and get creative with drawings and colors.
Explore Further
- Talk about each ingredient as they are being measured. Let the kids touch and play with the beeswax pastilles. Who makes beeswax and how? How do you get oil out of almonds and avocado? Smell the cocoa butter and talk about where chocolate comes from, etc.
- Have the kids observe the liquid cooling in the tubes. Using clear tubes is fun because you get to watch the mixture harden. Talk about what causes the liquid to harden. This is also a great time to discuss how to use lip balms appropriately. I love incorporating a hydration discussion about the importance of drinking plenty of water and signs of dehydration (e.g., dry or chapped lips).
Pro Tip
- Antsy to get the lip balm tubes hardened? Carefully set the tubes in the freezer for 20 minutes or so. I often use a cookie sheet or Pyrex square dish to use as a stabilizing container.
Want More Holiday Gift Making Ideas?
Check Out These 10 Easy DIY Gift Ideas!
You may also be interested in:
- Holiday-Inspired Orange Body Care Recipes
- 5 DIY Holiday Decorating Ideas to Deck Your Halls (with Herbs!)
- DIY Aromatherapy: 3 Holiday Diffuser Blend Recipes