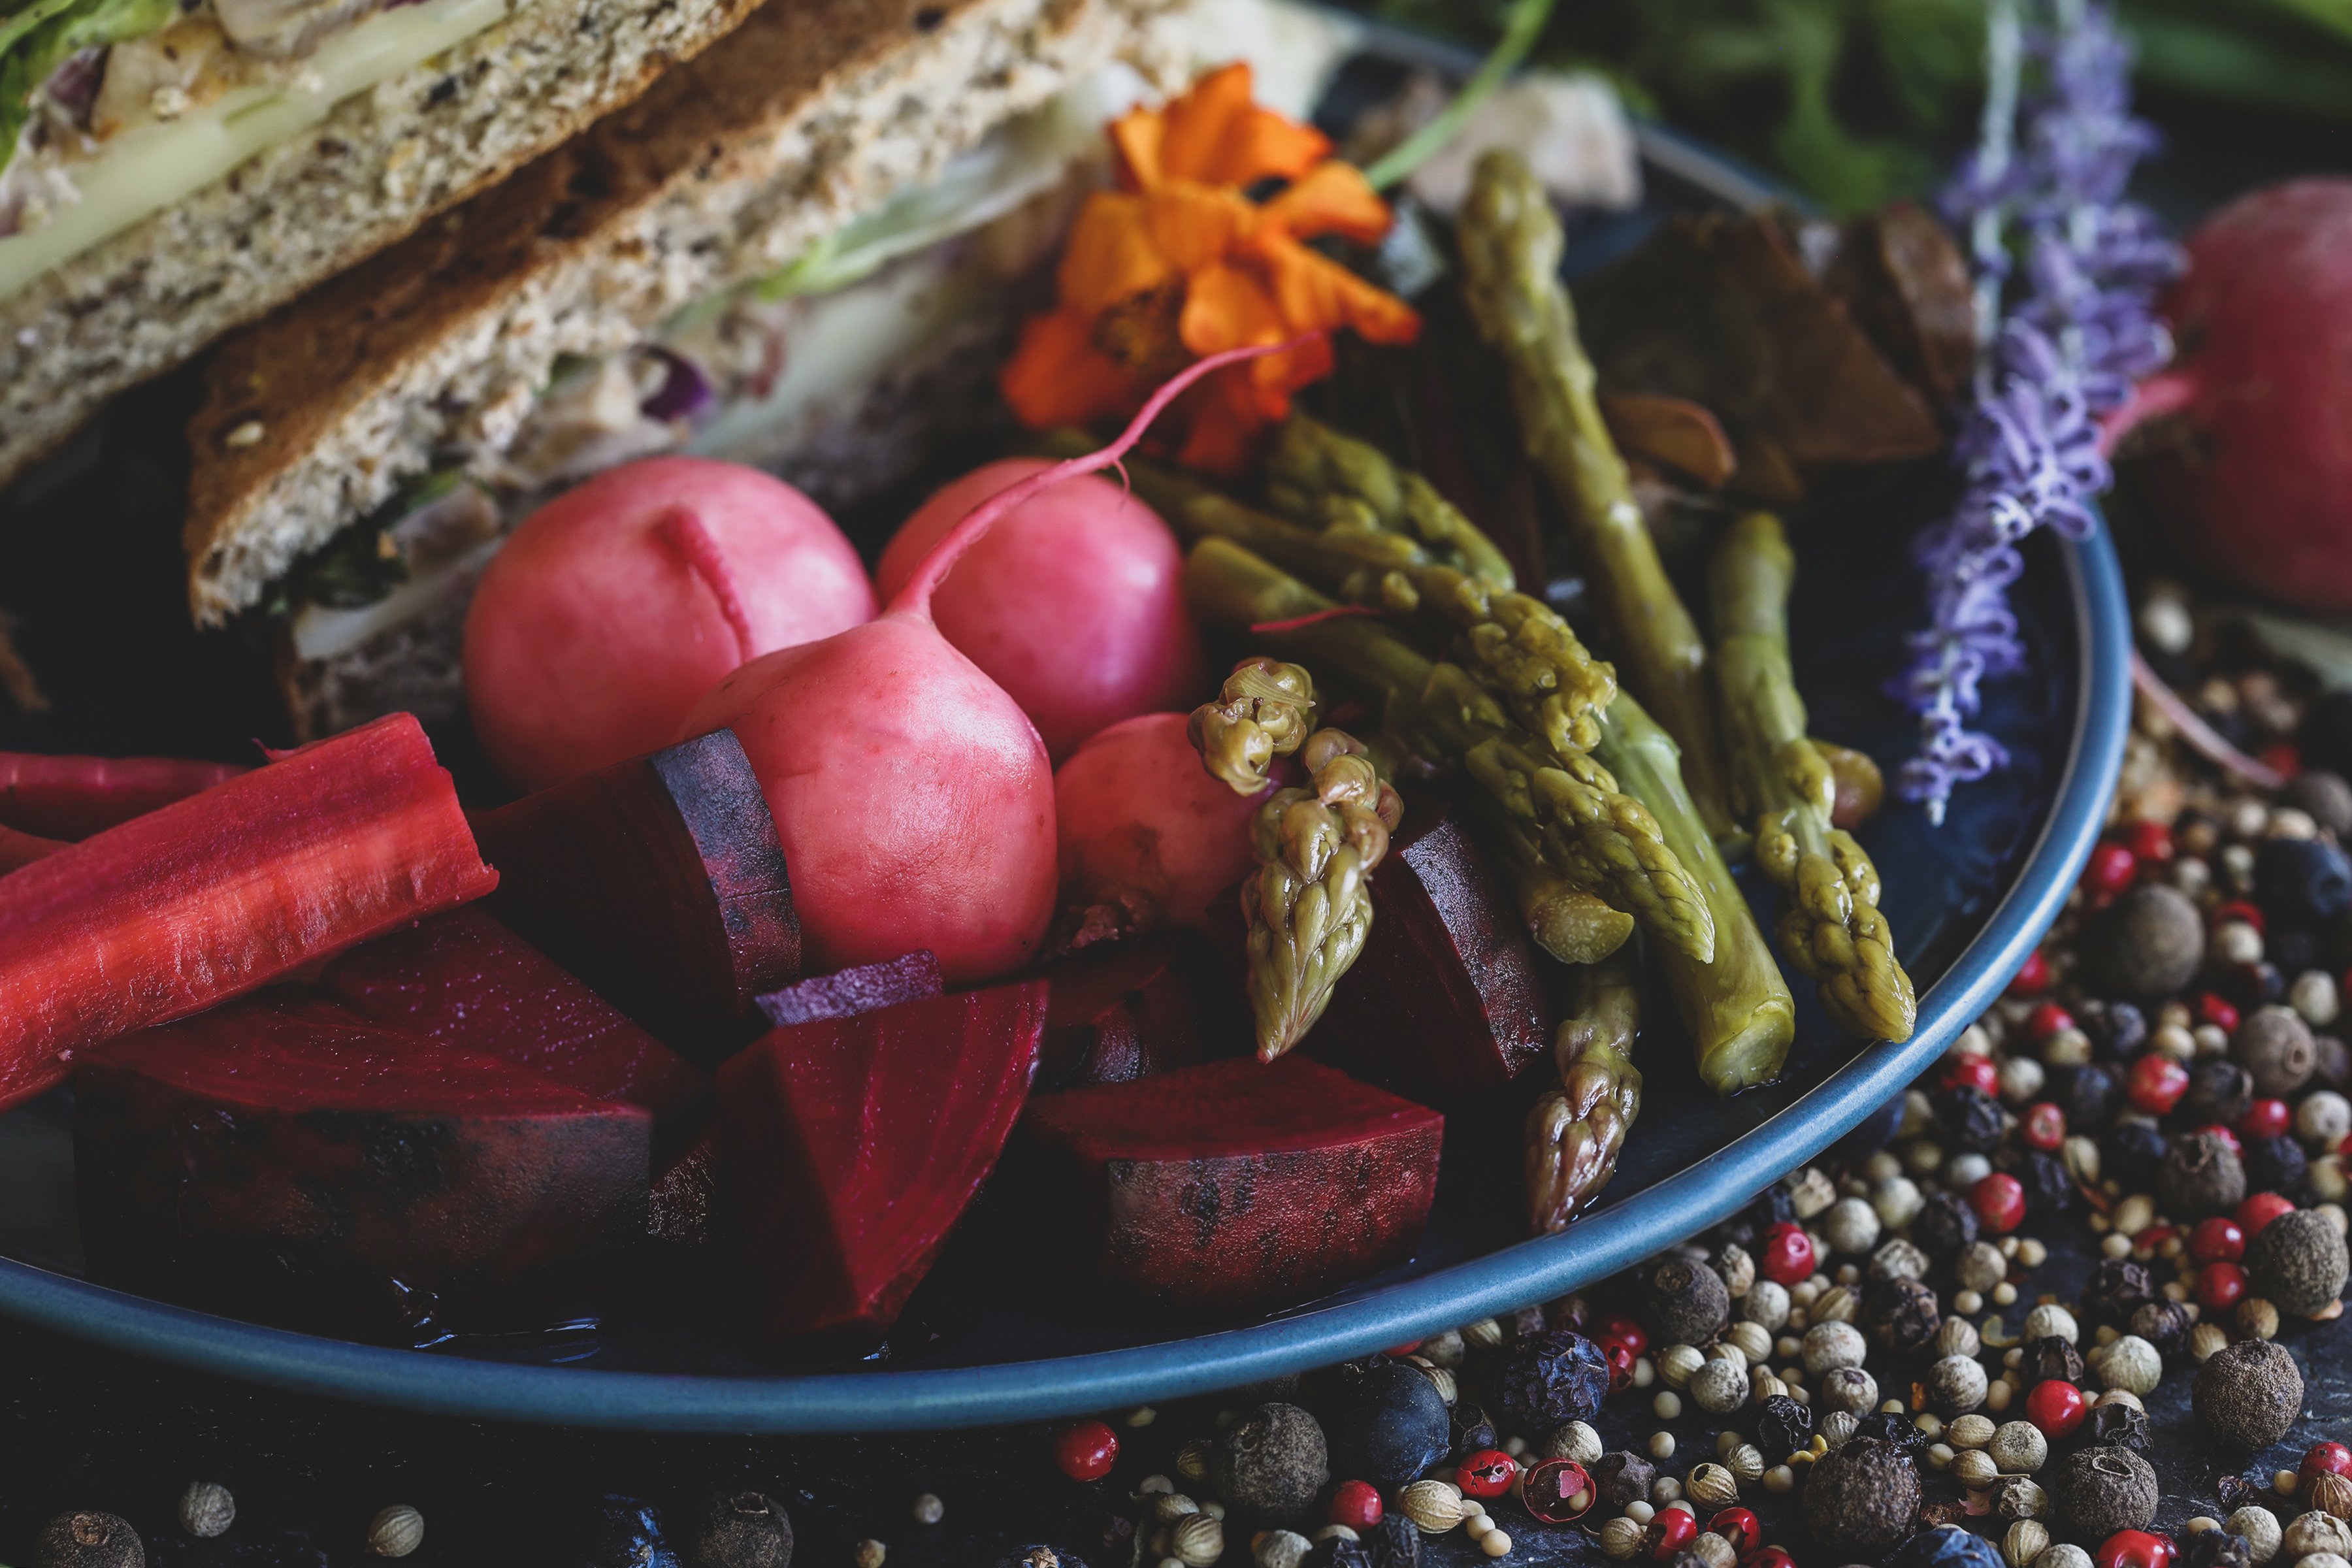
It’s the season of fresh and vibrant produce, and as my garden bounty gets close to being harvested, the anticipation of pickling season has me dreaming of all the food preservation projects I will be undertaking. I look forward to donning my kitchen apron and preserving the fruits (and vegetables) of my labor. While I whole-heartedly love canning, sometimes it’s nice to knock a little time off the process. I can’t tell you how many all-nighters I have pulled in the name of saving all the produce, but as I get a bit older, I don’t bounce back from those long nights quite as fast as I used to. One of my tricks for saving a considerable amount of time is quick pickling!
Quick pickles are also referred to as “refrigerator pickles” and are a simple process that does not require any kind of water bath. It cuts the time of preserving by more than half. Like anything in life, there are pros and cons to this technique.
Pros to Quick Pickles
- Takes half the time
- Produce maintains better texture
- Great way to experiment with different flavor profiles
- Perfect for smaller gardens that are ready for harvest a little at a time
Cons to Quick Pickles
- Jars must be kept in the refrigerator, which is troublesome if you have limited fridge space
- Shelf life is significantly shorter (2 weeks versus 18 months when canned)
- Flavor profile is lighter because less heat and time is involved in the preservation
How to Make Quick-Pickled Vegetables
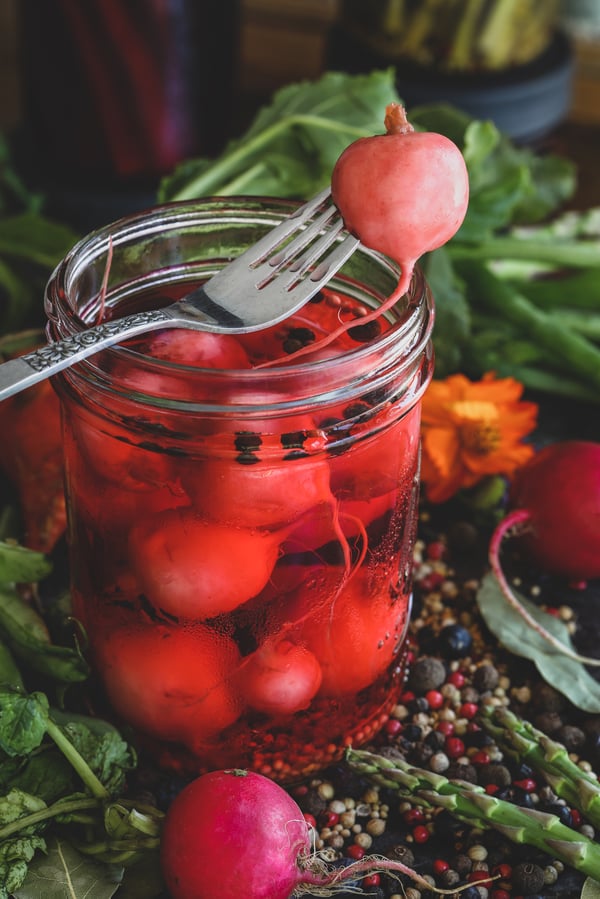
Refrigerator Pickle Brine Recipe
Enough for about 2 pints.
Ingredients
- About 3 cups organic vegetables of choice
- 1 cup organic apple cider vinegar, rice vinegar, or white vinegar (with at least 5% acidity)
- 1 cup clean, filtered water
- 1 Tbsp. fine sea salt
- 1 Tbsp. sugar (optional)
- 1-2 tsp. homemade pickling spice (see below) or pre-made, divided
- 2 organic bay leaves, divided
Directions
- Clean and chop veggies in size and shape of preference. Set aside.
- Add vinegar and water to non-reactive pot and turn heat to medium-high.
- While heating the brine, add 1 bay leaf to each sterilized jar and 1/2–1 tsp. of pickling spice blend, to taste.
- Fill jars with veggies, leaving 1/2 inch from the rim of the jar.
- When brine is hot enough to fully dissolve the salt and sugar, turn off stovetop.
- Add salt and sugar. Stir until fully dissolved.
- Pour brine over veggies, leaving at least 1/4 inch from the top, being sure to cover all of the veggies.
- Place lid loosely on to prevent fruit flies but with enough space to allow steam to dissipate.
- Once fully cooled, label with date and place in refrigerator.
- Enjoy within 14 days.
Pro Tips
- For harder vegetables like beets and carrots, smaller pieces will take on the pickle flavor faster. You can also partially cook them in the brine if you prefer them softer.
- Don’t toss your veggie tops! You can pickle those too, making this a zero-waste preservation process!
- After finishing your pickled veggies, you can use the infused brine in salad dressings, soups, stir-fries, or any other dish that calls for vinegar.

Homemade Pickling Spice Recipe
Ingredients
- 3 Tbsp. organic whole mustard seed
- 3 Tbsp. organic rainbow peppercorns
- 1 Tbsp. organic whole allspice berries
- 1 Tbsp. organic whole coriander seed
- 1 Tbsp. organic juniper berries
- 2 tsp. organic chili flakes (optional)
Directions
- Add all ingredients to a glass jar.
- Place lid on and shake to blend
- Adhere a label including the name of the blend and date you made it.
- Shake before each use.
Want to learn more about preserving food?
Try This Hibiscus Pepper Jam Recipe +
Learn How to Make Your Own Pectin
You may also be interested in:
How to Make Homemade Saurkraut
Fermented Hot Sauce Recipe
Support the Microbiome Through Diet + Recipes