DIY: Herbal Soap Making From Scratch

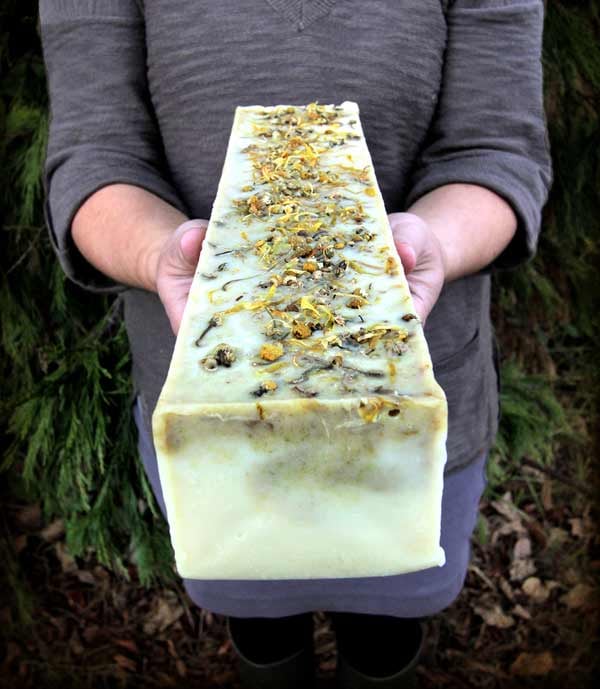
Person in gray dress holding block of finished soap with calendula and chamomile petals on top                  

Handcrafting soap from scratch is a mesmerizing and enchanting process.  Watching the transformation of oil and water makes you feel like a scientist, chemist, alchemist, or perhaps an herbal magician. There’s nothing quite like the satisfaction of lathering up with a luscious bar of your own homemade soap, and I’m beyond excited to share this DIY skill with you!After bathing with your homemade soap, you’ll be hooked. Industrial soap companies remove the glycerin from soap in order to produce bars that are firmer and longer-lasting. Glycerin occurs naturally during the soap making process, providing a moisturizing quality to soap. Since handmade soap retains glycerin, it is gentler to the skin than conventional store-bought soaps. This is also why handcrafted soap should be placed on a well-draining surface, and not left in standing water where it will quickly dissolve.Making soap is a little dangerous because of the lye, but don’t let that scare you away. With proper precautions, it is perfectly safe to make soap at home. Just make sure that you have a few hours of uninterrupted time, a well-ventilated space, wear gloves and safety goggles, and keep children or pets away. Once the soap has finished curing, there will be no residual lye, and you’ll have a perfect bar of skin-nurturing soap.
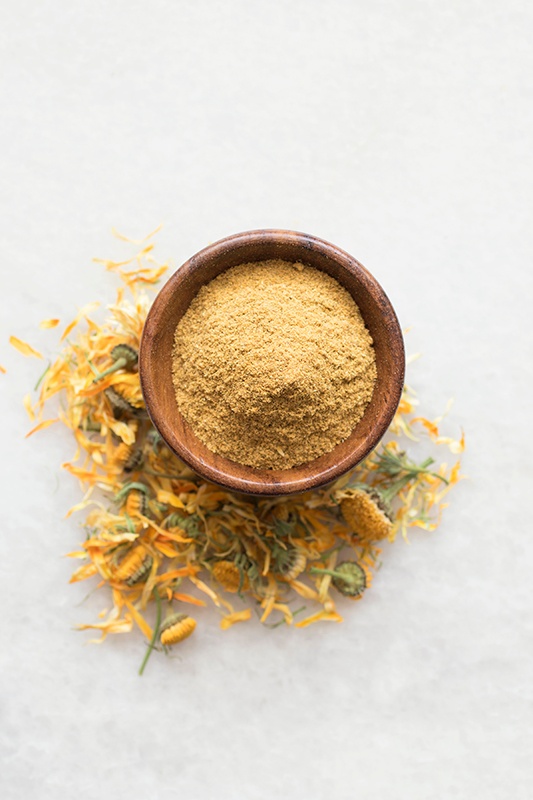
Wooden bowl full of organic calendula powder surrounded by calendula flowers on a white marble counter top

Recipe: Herbal Soap

This is a simple and unscented recipe enriched with nourishing herbs. Calendula, chamomile, and marshmallow provide wonderfully calming and soothing qualities, plus the powders add a light texture and color to the finished bars. Feel free to experiment with other herbs that you like to use for skin care. This recipe will yield a two-pound batch of soap, making approximately 10 bars, depending on how large they’re cut. If you wish to incorporate other ingredients or increase the size of the batch, use a soap making calculator to determine the appropriate amounts of water and lye. If you wish to add a scent, incorporate ½ - 2 ounces of essential oil when the soap is at trace. The herbs are optional and can be omitted for a pure bar of soap.

Equipment

  • Safety glasses
  • Rubber gloves
  • Scale
  • 2 thermometers
  • Rags and towels for cleaning spills
  • White vinegar for neutralizing lye spills and splashes
  • Large stainless steel pot
  • Glass or plastic pitcher
  • Wooden, plastic, or stainless steel spoons, a plastic spatula, and other mixing utensils
  • Soap mold: a wooden box, shoebox, milk carton, silicone mold, or a plastic container all work well
  • Freezer paper, parchment paper, or plastic bags to line your mold
  • Electric immersion stick blender (optional, but a time-saver!)
  • Newspaper and cardboard to cover your work area
  • Clear plastic food wrap

Ingredients

Pro Tips
  • Reserve a special pot, mixing containers, and other tools especially for soap making
  • Never use aluminum pots or utensils, as they will react with the lye
  • The lye can be found in hardware stores, cleaning supply companies, or online
  • Weigh all ingredients on a scale; soap is measured by weight, not volume
  • When making soap, we recommend wearing a long-sleeve shirt, pants, and shoes for your additional safety

Directions

  1. Gather all materials and clear work area of any clutter.
  2. Place cardboard and newspapers on the work space to protect from spills and splashes, keeping the white vinegar nearby.
  3. Make a calendula infusion by bringing 16 oz. of water to a boil in a pot, then remove from the burner, and add the calendula flowers.
  4. Place lid on pot and allow it to cool to room temperature.
  5. Once completely cool, strain out the flowers and reserve the liquid. (You can use water in the recipe instead of this infusion, but calendula increases the soothing properties of the soap.)
  6. Line soap mold with freezer paper, parchment paper, or plastic bags. Plastic or odd-shaped containers can be greased with a cooking spray instead of lined.
  7. Pick a well-ventilated area in order to minimize your exposure to the fumes.
  8. Put on goggles and gloves.
  9. Weigh out the calendula infusion and place into your glass or plastic pitcher.
  10. Weigh the lye, then slowly pour it into the same pitcher while mixing.
  11. Safety note: always add lye to the water and not the other way around. Adding water to lye may cause a bubbling "volcanic" reaction, increasing the risk of an accident or injury. If lye touches your skin, immediately flush the affected area under running water and neutralize with vinegar. Seek medical attention, if necessary. Lye will burn skin and can melt a hole on counter tops and other surfaces.
  12. Stir until the lye has thoroughly dissolved, while taking care not to inhale the fumes. If the fumes are too strong, leave the area, and return later to finish mixing. It may not be apparent, but the lye and water mixture will become very hot.
  13. Combine coconut oil and shea butter in a large stainless steel pot. Melt on the stove over a low temperature.
  14. Once melted, add remaining liquid oils to the pot.
  15. Watch the temperatures of both the solid and liquid oils. Ideally, they should cool down to the same temperature at the same time. If they do not cool at the same rate, gently heat or cool the solutions using a hot or cold water bath.
  16. When both solutions reach 90-105 degrees Fahrenheit, it’s time to mix.
  17. Wearing goggles and gloves, slowly pour the lye solutions into the stainless steel pot of melted oils while stirring. You’ll notice the mixture getting thicker, and it will begin to smell like soap.
  18. Stir until soap reaches the “trace” stage. This is when the soap leaves a faint mark for a few seconds on the surface of the soap before it sinks in. It will be a pudding-like consistency.
  19. Use an electric stick blender to quicken the process, working in short bursts that last for a few seconds each.  Stirring by hand can take 15-60 minutes, while an electric stick blender can reduce this time to 3-10 minutes.
  20. Once the soap reaches the trace stage, add the powdered herbs and stir until incorporated. If you’d like to add essential oils, this is the time to do it.
  21. Pour soap into mold. Make sure that it is distributed evenly. Tap the sides lightly or gently shake in order to remove any air bubbles.
  22. Sprinkle calendula and chamomile flowers on top of the soap. This is optional, but will add a special pretty touch to your finished creation.
  23. Cover mold with plastic food wrap to help prevent soda ash from appearing on the top of your bars. Soda ash isn’t harmful, but it appears as a light white dusting and isn’t desired for aesthetic reasons.
  24. Place soap in a warm area, covered with towels or a blanket to help insulate it and retain heat. Leave it undisturbed for 24 hours. Try not to peek! You want to retain heat in the mold.
  25. What to do with the mess in the kitchen?  One trick is to simply place all of the dirty utensils into the large stainless steel pot, and place it on a shelf in the garage, basement, or other out-of-the-way place for 2-3 weeks. The raw soap will be safe within a few weeks, making cleanup a snap! You can certainly clean everything immediately after making soap, but the mixture will still be caustic, so proceed with caution. Make sure to clean out the sink, countertops, and anything else that the raw soap touches. It’s good to wear gloves, wiping each surface with vinegar in case in case you missed any residual raw soap.
  26. Check soap after 24 hours. It has most likely gone through a gelling stage, which results in the soap becoming hard. The soap should be firm to the touch, yet still a little soft. You can either remove from the mold now, or leave it for another 24 hours depending on how soft it is. You’ll want to cut it when it’s firm to the touch, yet still soft enough to easily slice.
  27. Remove soap from mold, and cut into bars or other desired shapes.
  28. Allow bars to cure for at least 4-6 weeks before using. Cure on metal racks or cardboard, turning the bars daily (or as often as you remember) so that all sides are exposed to air.  The curing process hardens the bars and makes them gentler for the skin.
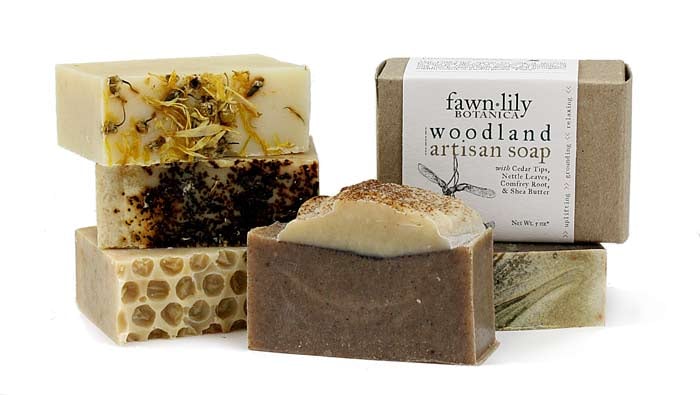
Bars of soap on a white backgroundSoap can be made with a variety of vegetable or animal oils, essential oils, herbs and spices, and many liquids including goat milk, coconut milk, coffee, and even beer.  Soap making is an obsession waiting to happen, and with all of the options, you’ll never tire of dreaming up new combinations. Handmade soap makes a wonderful gift for friends, co-workers, and loved ones. They will be thrilled to receive your wonderful creations, so feel free to soap away to your heart’s content!


Excited to get started?

Explore More Herbal Herbal Soap Recipes!


You may also enjoy: 


Trowel full of dried calendula blossoms


Topics: Aromatherapy, Natural Body Care, Herbal Gift Ideas

Irene

Written by Irene on May 10, 2015

Irene's extensive experience with herbal products and DIY recipes goes back to 1997, and since 2012 she’s owned her own skincare business, Fawn Lily Botanica, where she specializes in botanical-based facial care products. Irene’s recipes have been featured in local and national publications including the National Association for Holistic Aromatherapy (NAHA) Journal, Amaze Magazine, Willow and Sage magazine, MaryJanesFarm Magazine and Newsletter, Earth First Journal, Farming Magazine, Eugene Magazine, and the Eugene Weekly. Irene also served as a member of the Board of Directors for nonprofit Cascadia Wildands from 2013-2016.


WELCOME

We offer one of the most thorough selections of certified organic herbs, spices, and botanical products and are commited to responsible sourcing.

DIY: Herbal Soap Making From Scratch

Person in gray dress holding block of finished soap with calendula and chamomile petals on top                  

Handcrafting soap from scratch is a mesmerizing and enchanting process.  Watching the transformation of oil and water makes you feel like a scientist, chemist, alchemist, or perhaps an herbal magician. There’s nothing quite like the satisfaction of lathering up with a luscious bar of your own homemade soap, and I’m beyond excited to share this DIY skill with you!After bathing with your homemade soap, you’ll be hooked. Industrial soap companies remove the glycerin from soap in order to produce bars that are firmer and longer-lasting. Glycerin occurs naturally during the soap making process, providing a moisturizing quality to soap. Since handmade soap retains glycerin, it is gentler to the skin than conventional store-bought soaps. This is also why handcrafted soap should be placed on a well-draining surface, and not left in standing water where it will quickly dissolve.Making soap is a little dangerous because of the lye, but don’t let that scare you away. With proper precautions, it is perfectly safe to make soap at home. Just make sure that you have a few hours of uninterrupted time, a well-ventilated space, wear gloves and safety goggles, and keep children or pets away. Once the soap has finished curing, there will be no residual lye, and you’ll have a perfect bar of skin-nurturing soap.

Wooden bowl full of organic calendula powder surrounded by calendula flowers on a white marble counter top

Recipe: Herbal Soap

This is a simple and unscented recipe enriched with nourishing herbs. Calendula, chamomile, and marshmallow provide wonderfully calming and soothing qualities, plus the powders add a light texture and color to the finished bars. Feel free to experiment with other herbs that you like to use for skin care. This recipe will yield a two-pound batch of soap, making approximately 10 bars, depending on how large they’re cut. If you wish to incorporate other ingredients or increase the size of the batch, use a soap making calculator to determine the appropriate amounts of water and lye. If you wish to add a scent, incorporate ½ - 2 ounces of essential oil when the soap is at trace. The herbs are optional and can be omitted for a pure bar of soap.

Equipment

  • Safety glasses
  • Rubber gloves
  • Scale
  • 2 thermometers
  • Rags and towels for cleaning spills
  • White vinegar for neutralizing lye spills and splashes
  • Large stainless steel pot
  • Glass or plastic pitcher
  • Wooden, plastic, or stainless steel spoons, a plastic spatula, and other mixing utensils
  • Soap mold: a wooden box, shoebox, milk carton, silicone mold, or a plastic container all work well
  • Freezer paper, parchment paper, or plastic bags to line your mold
  • Electric immersion stick blender (optional, but a time-saver!)
  • Newspaper and cardboard to cover your work area
  • Clear plastic food wrap

Ingredients

Pro Tips
  • Reserve a special pot, mixing containers, and other tools especially for soap making
  • Never use aluminum pots or utensils, as they will react with the lye
  • The lye can be found in hardware stores, cleaning supply companies, or online
  • Weigh all ingredients on a scale; soap is measured by weight, not volume
  • When making soap, we recommend wearing a long-sleeve shirt, pants, and shoes for your additional safety

Directions

  1. Gather all materials and clear work area of any clutter.
  2. Place cardboard and newspapers on the work space to protect from spills and splashes, keeping the white vinegar nearby.
  3. Make a calendula infusion by bringing 16 oz. of water to a boil in a pot, then remove from the burner, and add the calendula flowers.
  4. Place lid on pot and allow it to cool to room temperature.
  5. Once completely cool, strain out the flowers and reserve the liquid. (You can use water in the recipe instead of this infusion, but calendula increases the soothing properties of the soap.)
  6. Line soap mold with freezer paper, parchment paper, or plastic bags. Plastic or odd-shaped containers can be greased with a cooking spray instead of lined.
  7. Pick a well-ventilated area in order to minimize your exposure to the fumes.
  8. Put on goggles and gloves.
  9. Weigh out the calendula infusion and place into your glass or plastic pitcher.
  10. Weigh the lye, then slowly pour it into the same pitcher while mixing.
  11. Safety note: always add lye to the water and not the other way around. Adding water to lye may cause a bubbling "volcanic" reaction, increasing the risk of an accident or injury. If lye touches your skin, immediately flush the affected area under running water and neutralize with vinegar. Seek medical attention, if necessary. Lye will burn skin and can melt a hole on counter tops and other surfaces.
  12. Stir until the lye has thoroughly dissolved, while taking care not to inhale the fumes. If the fumes are too strong, leave the area, and return later to finish mixing. It may not be apparent, but the lye and water mixture will become very hot.
  13. Combine coconut oil and shea butter in a large stainless steel pot. Melt on the stove over a low temperature.
  14. Once melted, add remaining liquid oils to the pot.
  15. Watch the temperatures of both the solid and liquid oils. Ideally, they should cool down to the same temperature at the same time. If they do not cool at the same rate, gently heat or cool the solutions using a hot or cold water bath.
  16. When both solutions reach 90-105 degrees Fahrenheit, it’s time to mix.
  17. Wearing goggles and gloves, slowly pour the lye solutions into the stainless steel pot of melted oils while stirring. You’ll notice the mixture getting thicker, and it will begin to smell like soap.
  18. Stir until soap reaches the “trace” stage. This is when the soap leaves a faint mark for a few seconds on the surface of the soap before it sinks in. It will be a pudding-like consistency.
  19. Use an electric stick blender to quicken the process, working in short bursts that last for a few seconds each.  Stirring by hand can take 15-60 minutes, while an electric stick blender can reduce this time to 3-10 minutes.
  20. Once the soap reaches the trace stage, add the powdered herbs and stir until incorporated. If you’d like to add essential oils, this is the time to do it.
  21. Pour soap into mold. Make sure that it is distributed evenly. Tap the sides lightly or gently shake in order to remove any air bubbles.
  22. Sprinkle calendula and chamomile flowers on top of the soap. This is optional, but will add a special pretty touch to your finished creation.
  23. Cover mold with plastic food wrap to help prevent soda ash from appearing on the top of your bars. Soda ash isn’t harmful, but it appears as a light white dusting and isn’t desired for aesthetic reasons.
  24. Place soap in a warm area, covered with towels or a blanket to help insulate it and retain heat. Leave it undisturbed for 24 hours. Try not to peek! You want to retain heat in the mold.
  25. What to do with the mess in the kitchen?  One trick is to simply place all of the dirty utensils into the large stainless steel pot, and place it on a shelf in the garage, basement, or other out-of-the-way place for 2-3 weeks. The raw soap will be safe within a few weeks, making cleanup a snap! You can certainly clean everything immediately after making soap, but the mixture will still be caustic, so proceed with caution. Make sure to clean out the sink, countertops, and anything else that the raw soap touches. It’s good to wear gloves, wiping each surface with vinegar in case in case you missed any residual raw soap.
  26. Check soap after 24 hours. It has most likely gone through a gelling stage, which results in the soap becoming hard. The soap should be firm to the touch, yet still a little soft. You can either remove from the mold now, or leave it for another 24 hours depending on how soft it is. You’ll want to cut it when it’s firm to the touch, yet still soft enough to easily slice.
  27. Remove soap from mold, and cut into bars or other desired shapes.
  28. Allow bars to cure for at least 4-6 weeks before using. Cure on metal racks or cardboard, turning the bars daily (or as often as you remember) so that all sides are exposed to air.  The curing process hardens the bars and makes them gentler for the skin.

Bars of soap on a white backgroundSoap can be made with a variety of vegetable or animal oils, essential oils, herbs and spices, and many liquids including goat milk, coconut milk, coffee, and even beer.  Soap making is an obsession waiting to happen, and with all of the options, you’ll never tire of dreaming up new combinations. Handmade soap makes a wonderful gift for friends, co-workers, and loved ones. They will be thrilled to receive your wonderful creations, so feel free to soap away to your heart’s content!


Excited to get started?

Explore More Herbal Herbal Soap Recipes!


You may also enjoy: 


Trowel full of dried calendula blossoms


Topics: Aromatherapy, Natural Body Care, Herbal Gift Ideas

Irene

Written by Irene on May 10, 2015

Irene's extensive experience with herbal products and DIY recipes goes back to 1997, and since 2012 she’s owned her own skincare business, Fawn Lily Botanica, where she specializes in botanical-based facial care products. Irene’s recipes have been featured in local and national publications including the National Association for Holistic Aromatherapy (NAHA) Journal, Amaze Magazine, Willow and Sage magazine, MaryJanesFarm Magazine and Newsletter, Earth First Journal, Farming Magazine, Eugene Magazine, and the Eugene Weekly. Irene also served as a member of the Board of Directors for nonprofit Cascadia Wildands from 2013-2016.