Make a Plant Press

The frosty, bloomless months of winter offer their own charms as mosses, lichens, and mushrooms pop from every moist nook under the forest canopy, but who doesn’t long for the sun filled beauty of handpicked wildflowers? The colorful blossoms of spring and summer can be enjoyed year round with one simple tool that is easily crafted during a lazy afternoon at home. 

Plant presses have been used for hundreds of years to dry and preserve specimens for safe travel across vast continents and rough seas. Explorers would guard their botanical treasures like gold, hoping to return home with a variety of floral curiosities for later identification, taxonomic cataloging, and even cherished supplies for artwork.

Presses can be small enough to carry in your hiking pack, perfect for collecting herbaceous plant leaves, roots, and flowers as you wander, or they can be made large enough to press a towering Verbascum thapsus from your garden, root to flower. It is important to press flowers as soon as possible after picking them to avoid wilting and improve your results. You should also make note of the plant’s common name, Latin name, location, height, habitat, abundance, date, and other valuable information that can fade from memory and leave you stumped when you’re finally ready to use your pressings.

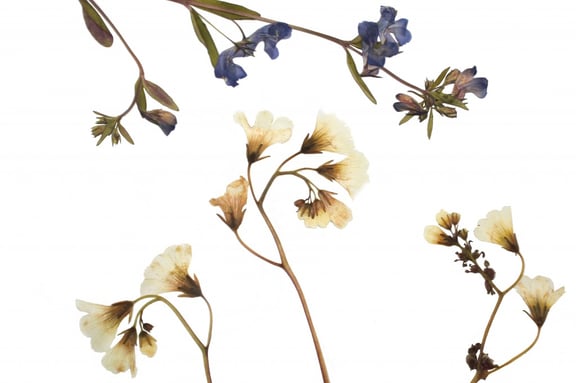
Your dried flowers, leaves, ferns, and roots can be mounted in glass for display, placed in papier-mâché crafts, used to make stationary and scrapbooks, or to adorn homemade candles. Another fun project would be to document your favorite wild or garden plants in a home herbarium. To do this, simply arrange your specimens on acid-free paper with all of the pertinent harvesting information and glue or cover with contact paper to conveniently catalog your prized pressings.    


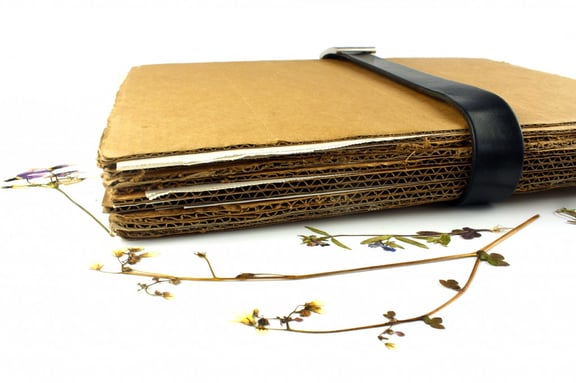
Cardboard Plant Press

There are several ways to make a plant press. The easiest and most economical choice can be constructed beautifully with materials from your recycling bin! This press would also be the perfect handmade gift for the crafter or plant lover in your life.

This is what you will need:

             * Several old newspapers

             * Corrugated cardboard

             * Two pieces of wood

             * Two straps with buckles that can be secured: belts, canvas straps, light bungee cords, rope 

  1. Fold individual sheets of newspaper along the normal folding creases. These folded sheets will become your blotters.
  2. Cut the cardboard to fit your folded newspaper blotters. This will save you the time and trouble of cutting every piece of newspaper to size. You’ll want the zigzag corrugation to run through the width of your cardboard, not the length, to allow for maximum airflow.    
  3. Assemble your press by placing three single sheets of folded newspaper on top of one piece of cardboard, and then continue by layering another piece of cardboard, three more individual sheets of folded newspaper, and another piece of cardboard. Repeat this process until you’ve reached your desired stack.
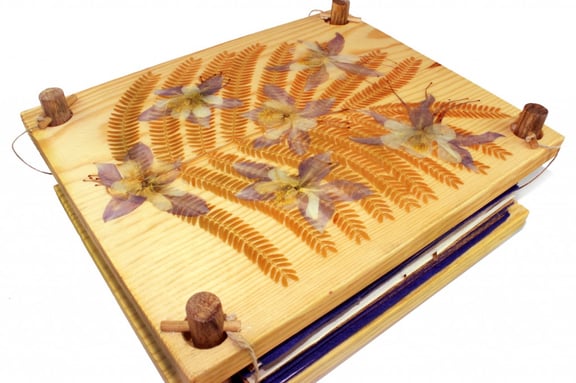
  4. Next, sandwich your stack between two pieces of wood that measure about the same size or ½ inch larger than the cardboard. You can decorate the wood boards with paint, markers, or decoupage if you’re feeling extra crafty!
  5. Secure two straps around the width of the boards to hold it all together. Old belts work perfectly; just keep in mind that the press doesn’t need too much pressure to work well.


Once your press is completed, it’s time to harvest your specimens, remove dirt with a dry brush, and if desired, dissect them to isolate the characteristic botanical organs. Next, open your press to find the first set of folded newspapers. Select the middle sheet of newspaper and unfold. Position your plant material on the newspaper without overlapping and refold the sheet to cover. Plants with long stalks can be bent into a zigzag to fit in your press. Make sure there is a blotter underneath the sheet containing the herbs and replace the top blotter sheet along with the cardboard. Repeat until you’ve pressed all of your plants. Each pressed plant should be tucked between two blotters and separated by cardboard.

Allow the plants to set for one day and then open your press to adjust the delicate petals and leaves that may be curled or crooked. Most plants will be dry and ready to use within one week’s time, but they will happily wait in the press until you are ready to honor them with creativity or study.    


The Mountain Rose Herbs Team

Written by The Mountain Rose Herbs Team on January 3, 2011

Over the last three decades, the Mountain Rose Herbs Team has created and recreated thousands of recipes. This article is the result of many of our staff's combined herbal expertise and passion for herbalism. We hope you enjoy these time-tested recipes.


WELCOME

We offer one of the most thorough selections of certified organic herbs, spices, and botanical products and are commited to responsible sourcing.

Make a Plant Press

The frosty, bloomless months of winter offer their own charms as mosses, lichens, and mushrooms pop from every moist nook under the forest canopy, but who doesn’t long for the sun filled beauty of handpicked wildflowers? The colorful blossoms of spring and summer can be enjoyed year round with one simple tool that is easily crafted during a lazy afternoon at home. 

Plant presses have been used for hundreds of years to dry and preserve specimens for safe travel across vast continents and rough seas. Explorers would guard their botanical treasures like gold, hoping to return home with a variety of floral curiosities for later identification, taxonomic cataloging, and even cherished supplies for artwork.

Presses can be small enough to carry in your hiking pack, perfect for collecting herbaceous plant leaves, roots, and flowers as you wander, or they can be made large enough to press a towering Verbascum thapsus from your garden, root to flower. It is important to press flowers as soon as possible after picking them to avoid wilting and improve your results. You should also make note of the plant’s common name, Latin name, location, height, habitat, abundance, date, and other valuable information that can fade from memory and leave you stumped when you’re finally ready to use your pressings.

Your dried flowers, leaves, ferns, and roots can be mounted in glass for display, placed in papier-mâché crafts, used to make stationary and scrapbooks, or to adorn homemade candles. Another fun project would be to document your favorite wild or garden plants in a home herbarium. To do this, simply arrange your specimens on acid-free paper with all of the pertinent harvesting information and glue or cover with contact paper to conveniently catalog your prized pressings.    


Cardboard Plant Press

There are several ways to make a plant press. The easiest and most economical choice can be constructed beautifully with materials from your recycling bin! This press would also be the perfect handmade gift for the crafter or plant lover in your life.

This is what you will need:

             * Several old newspapers

             * Corrugated cardboard

             * Two pieces of wood

             * Two straps with buckles that can be secured: belts, canvas straps, light bungee cords, rope 

  1. Fold individual sheets of newspaper along the normal folding creases. These folded sheets will become your blotters.
  2. Cut the cardboard to fit your folded newspaper blotters. This will save you the time and trouble of cutting every piece of newspaper to size. You’ll want the zigzag corrugation to run through the width of your cardboard, not the length, to allow for maximum airflow.    
  3. Assemble your press by placing three single sheets of folded newspaper on top of one piece of cardboard, and then continue by layering another piece of cardboard, three more individual sheets of folded newspaper, and another piece of cardboard. Repeat this process until you’ve reached your desired stack.
  4. Next, sandwich your stack between two pieces of wood that measure about the same size or ½ inch larger than the cardboard. You can decorate the wood boards with paint, markers, or decoupage if you’re feeling extra crafty!
  5. Secure two straps around the width of the boards to hold it all together. Old belts work perfectly; just keep in mind that the press doesn’t need too much pressure to work well.


Once your press is completed, it’s time to harvest your specimens, remove dirt with a dry brush, and if desired, dissect them to isolate the characteristic botanical organs. Next, open your press to find the first set of folded newspapers. Select the middle sheet of newspaper and unfold. Position your plant material on the newspaper without overlapping and refold the sheet to cover. Plants with long stalks can be bent into a zigzag to fit in your press. Make sure there is a blotter underneath the sheet containing the herbs and replace the top blotter sheet along with the cardboard. Repeat until you’ve pressed all of your plants. Each pressed plant should be tucked between two blotters and separated by cardboard.

Allow the plants to set for one day and then open your press to adjust the delicate petals and leaves that may be curled or crooked. Most plants will be dry and ready to use within one week’s time, but they will happily wait in the press until you are ready to honor them with creativity or study.    

The Mountain Rose Herbs Team

Written by The Mountain Rose Herbs Team on January 3, 2011

Over the last three decades, the Mountain Rose Herbs Team has created and recreated thousands of recipes. This article is the result of many of our staff's combined herbal expertise and passion for herbalism. We hope you enjoy these time-tested recipes.