While I have been a gardener for nearly thirty years, only recently have I begun saving seeds from my garden with any seriousness. It always seemed a bit daunting and mysterious, and for many years I didn’t think much about where the seeds came from. I simply bought seeds. Period.
Then, I started getting seeds from other gardeners and began to learn more about harvesting, storing, and sharing seeds. There are some great reasons to save seeds from your garden plants! Not only can it save money, but the seeds harvested from your strongest plants are already acclimated to your soil, climate, and growing conditions. The plants become conditioned and the “offspring” have a leg up (so to speak).
I still consider myself somewhat of a beginner, but as each year passes, my confidence grows and I learn more about the best time to collect seeds, as well as new ways to dry and store them. Here’s a little guide to get you started collecting seeds from your garden too…
How to collect and save those precious seeds...
1. Collect seeds from the healthiest, strongest plants. There is something to be said for genetics when it comes to propagating plants. Whether you are dividing or saving seed, go to the best-looking, happiest plants as parents.
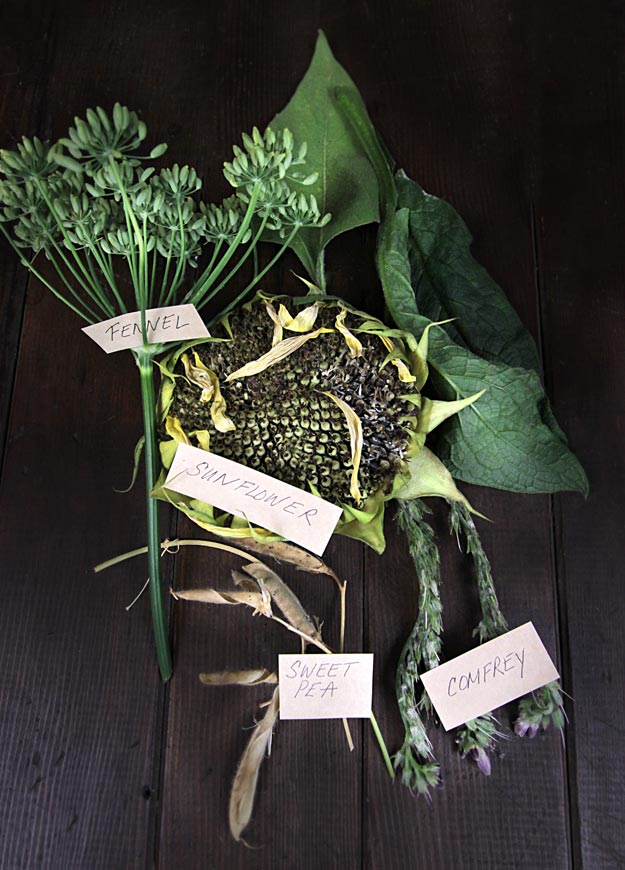
2. Allow the seeds to develop on the plant as long as possible. This means a willingness to invite a little untidy chaos into your garden. Many of us have been trained to cut off flower heads as soon as they start to wilt and become unsightly. In order to collect viable seeds, the plants have to be allowed to “go to seed” and put energy into developing healthy seeds, pods, or, in the case of sunflowers (Helianthus annuus) and other Asteraceae family plants—what most folks think of as the “flower” is actually a bunch of flowers packed into a head that produce a huge round of seeds.
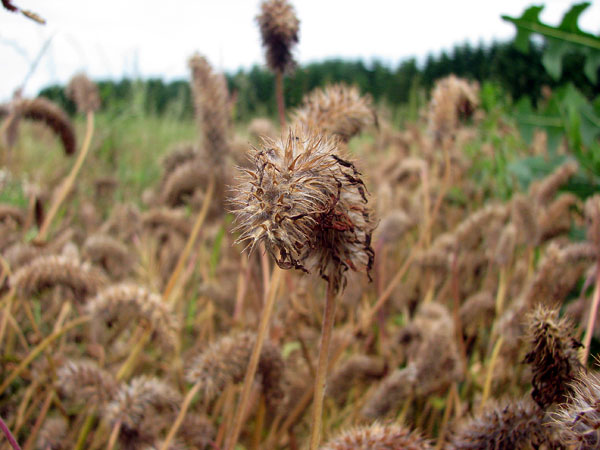
3. Be prepared to battle the critters! It can be a bit of a dance to let the seeds develop on the plants and get to them before the squirrels, birds, and other seed-eaters do. In the case of those sunflowers, I harvest the biggest head from the best plants and I allow it to get heavy and droopy with seeds (you can harvest and dry the petals to use too), but I do cut it off and bring it in to the garage to finish aging before the squirrels can get to it. I then let the critters have some of the smaller heads, and feed some of them to our chickens! Some gardeners will tie a plastic or paper bag over a flower or group of flowers they intend to harvest. This allows the seeds to continue ripening on the plant and protects them from the critters.
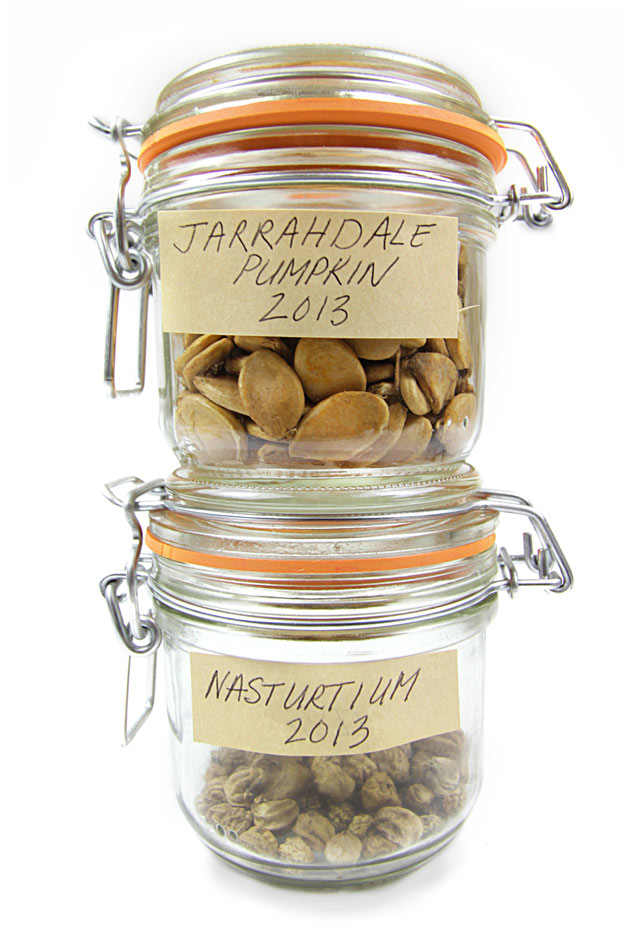
4. Some plants will drop their seeds before they are ripe and dry. Nasturtiums (Tropaeolum spp) are one of those plants and soon after the flowers wilt, the plant will drop plump green seeds onto the ground. I often let some of these just fall where they will and they dry, age, and, if we’re lucky, eventually sink down into dirt and grow new plants. I love finding surprise “nasties” tucked into cracks and along the edges of the garden. You can collect them from the ground, however, while they are still green and allow to dry. They can then be stored and planted “on purpose” in other areas of the garden.
5. Collecting seeds from pods can be a little tricky. Normally the pods will start out small, green, and tightly closed. Shepherd's Purse (Capsella bursa-pastoris) has little heart-shaped pods. As the pods age, they generally get browner and dryer. You’ll want to harvest the seeds from these pods once they are mature and dry, but not allow the pods to go so long they naturally split and drop the seeds. Plants of the Brassicaceae family (this includes plants like Mustard) will form tight pods called silicles or siliques. This is another instance where putting a bag over the pods can be helpful. I will also harvest the pods when they are a little under-ripe and allow them to dry on a paper towel or cotton napkin until they are dry, brittle, and ready to pop open to release their seeds.
6. Scattering seeds—there are some plants that I encourage to self-seed throughout my garden: Calendula (Calendula officinalis), Chamomile (Matricaria recutita), Columbine (Aquilegia), and Dame’s Rocket (Hesperis matronalis), just to name a few. For these plants, I allow the seeds to ripen on the stem and then I help them to scatter by removing the seeds and broadcasting them throughout the areas of the garden where I’d like them to grow. For Columbine seeds, I actually have to clip the flower head off and turn it upside down, shaking out the tiny round seeds. As long as it doesn’t get too cold (I have a zone 8 garden), they will settle in and grow where they land. If you live in an area where the winters are cold and the plants are unprotected, it is best to gather the seed and store inside until spring.
7. If you do need to dry the seeds, you will want a warm, dry place to do this! If it is late summer and the days are warm and dry, hanging or laying them out of doors may work just fine (as long as you can protect them from the critters and the wind.) A garage, shed, or even the dining room table can work just fine too. Lay them out on a paper towel, cotton cloth, or torn open brown paper sacks and allow to dry thoroughly. For stalks of seeds, like Fennel, you may want to hang upside down as you would for herb drying, making sure to have a clean cloth or bag to catch the seeds that drop. I like to use a paper bag or sack, shaking and tapping the stalks against the inside sides of the bag to release all the seeds. There are some plants, like Echinacea (Echinacea purpurea), where the flower/seed heads are rather dense. I cut these after the outside petals fall and bring the whole head in to dry. Once, it is dry and brittle, I use my thumbs to loosen the seeds and release, spreading them out on the paper to dry for another day or so.
8. Branch out and try saving vegetable and other plant seeds! Squash (winter and summer) is one of the easiest to try. Choose one of the best specimens from an heirloom (or, at least, non-hybrid) variety and scoop out the seeds. Rinse and spread out to dry on paper towels or brown paper until thoroughly dry.
9. Store the saved seeds in an airtight container (sealing plastic bags work fine, but I like glass jars with lids for extra protection from moisture and temperature changes. Our clear glass salve and/or pantry jars are perfect, but you can also use recycled canning, baby food, or other jars. Be sure to label with the plant, the Latin name if you keep track of such things, and the year. Seeds do lose their viability over time and, while you may think you’ll remember what’s what, labeling is imperative!
10. Keep in a cool, dry place out of direct sunlight until ready to plant.
Need some seeds to get started?
We offer a wonderful selection of organic herb seeds from Horizon Herbs!
Looking for more resources?
Be sure to check out these wonderful books too:
Growing and Using Herbs Successfully