Savoring The Tradition Of Homemade Sauerkraut

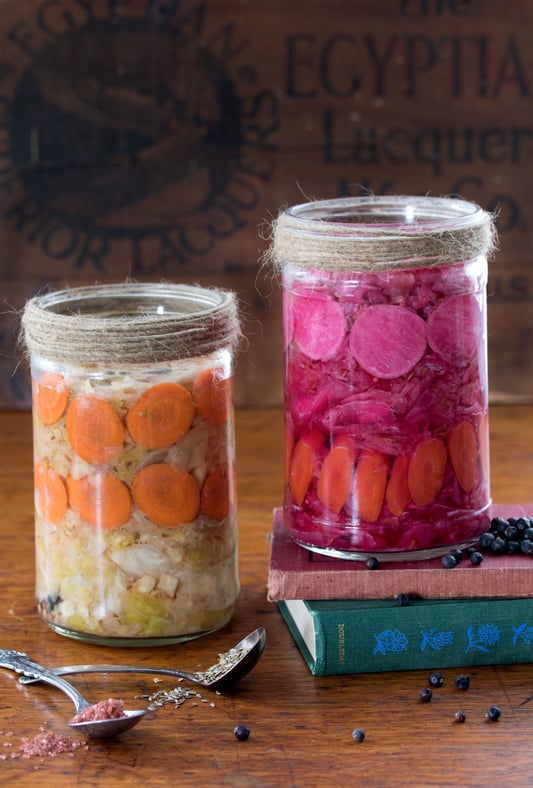
Jars of colorful homemade sauerkraut with ingredients around them

Preserving food is so much more than extending the year’s harvest. It’s a way to connect with the practices of our ancestors. No matter what part(s) of the world your cultural lineage descends from, your relatives preserved food in one way or another. As we begin to transition into the colder months, I channel that knowledge and dream of how my pantry will evolve throughout the harvest. As the cabbages in my humble garden begin to peak, I get excited thinking of all of the different flavors of sauerkraut I can create.

Sauerkraut is a staple in my household. One of my favorite things about making this veggie ferment is that it’s an art form each and every time. There are endless possibilities of flavor combinations, and the only limit is one’s imagination. While there is a lot of room for intuition and culinary expression, there are also some guiding principles that will help ensure successful fermentation.

Tips for Making Sauerkraut at Home

  • Start with clean tools and hands. Be sure if you are going to massage your cabbage by hand, that you clean your nail beds very well.
  • Use only pure and unrefined salts.
  • Use organic vegetables and spices to keep your ferments free from synthetic chemicals.
  • Optimal fermentation temperature occurs at 62-72 degrees Fahrenheit.
  • Ensure the brine is completely covering your vegetables throughout the entire process.
  • Green cabbage makes more brine whereas red cabbage has a firmer texture. I like to mix and match to achieve the best of both worlds.
  • If you need additional brine, combine 2 cups of warm water with 1 tablespoon of salt. Let it cool before adding to your kraut.
  • It is normal to have a white film on top during fermentation. Simply scrape it off and allow it to continue working its magic.

There are two traditional herb-filled recipes that I have shared below to get you started. I hope you enjoy this year’s harvest!

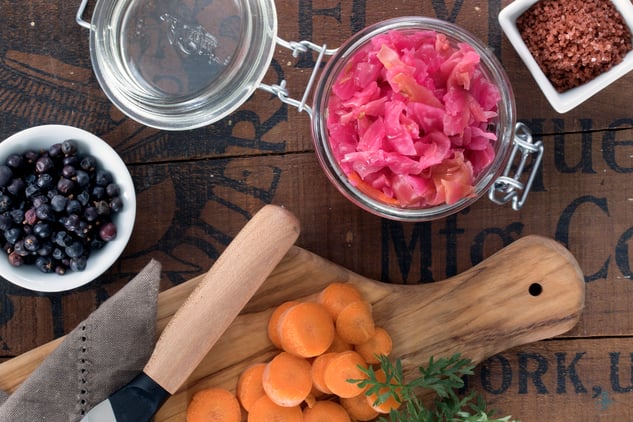
Ingredients for Red Alaea Sauerkraut including bowl of juniper berries and jar of colored cabbage

Red Alaea Kraut Recipe

Yields ½ Gallon

Ingredients:

Directions: see below

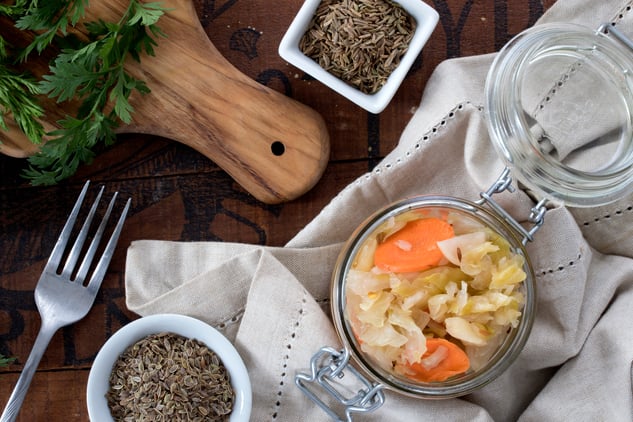
Glass jar of seeded sauerkraut with caraway seeds and mustard seeds with napkin and fork

Traditional Seeded Kraut Recipe

Yields ½ Gallon

Ingredients:

Directions: see below

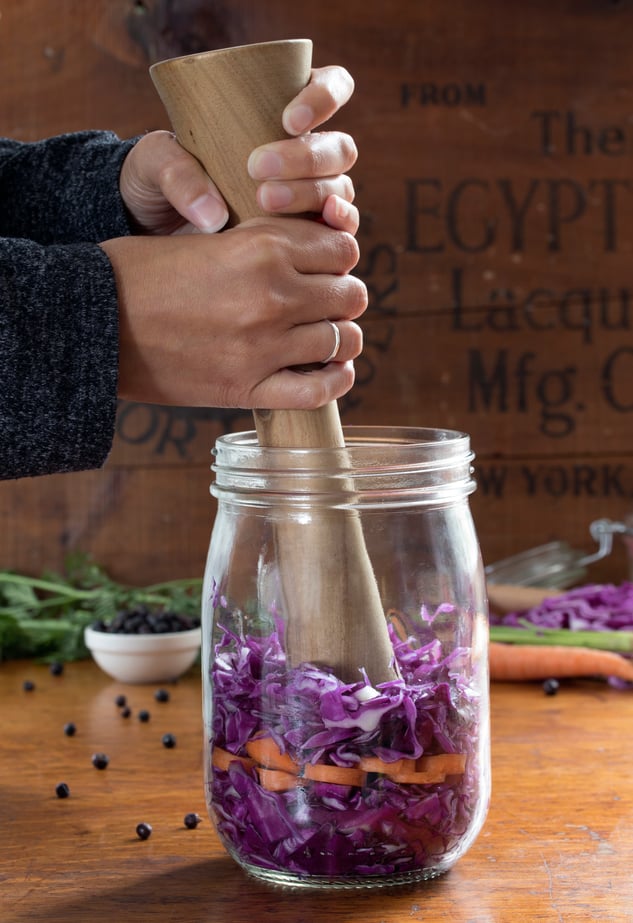
Hands using wooden pestle to massage cabbage to make sauerkraut in a glass jar

How To Make Homemade Sauerkraut

These directions apply to both of the recipes listed above.

  1. Chop all of your vegetables into pieces slightly larger than the desired size of your kraut.
  2. Begin massaging the cabbage while adding the salt, a little at a time. The salt coupled with the massaging will help release the natural water content of the cabbage to create your brine. If you want your cabbage to maintain a slightly firm texture, don’t overdo it with the massaging.
  3. Once you have a nice brine going, you can add in your other veggies to get them coated with brine. Unless you want them fully blended into the kraut, do not massage them.
  4. Add your spices and mix evenly. Some say adding spices can slow down mold growth in the kraut, making for a more consistent ferment.
  5. Using your clean hands or a "pickle packer" press the mixture tightly into clean glass jars or a fermentation crock. Ensure your veggies are completely covered with brine. (You can use a fermentation weight to hold down the veggies down or check on it daily and push the cabbage to submerge it in the brine.)
  6. Secure a plastic lid or a metal lid with parchment paper underneath to prevent corrosion. Store in a dark place for 1-3 weeks. The longer you ferment, the more beneficial bacteria there will be. Also, keep in mind that the longer the ferment, the more sour the flavor. Crack the lid every few days to allow the CO2 to escape.
  7. Once it's fermented to your liking, store in a refrigerator or cool, dark, dry space. You can separate into smaller jars for everyday use. Sauerkraut can be stored in the fridge for a very long time; I have never had it spoil after preservation.  
  8. Enjoy with family and friends!

WANT TO MAKE SURE YOU GET YOUR KRAUT "JUST RIGHT?"

Download Our Kraut Troubleshooting PDF

You May Also Like


Topics: Culinary, Recipes

Jessicka

Written by Jessicka on October 16, 2017

Jessicka Nebesni is the Senior Marketing Strategist and Herbal Liason for Mountain Rose Herbs. She is always working towards sharing the most educational, empowering, and useful resources with the Mountain Rose Herbs community. Having practiced Macrobiotic food preparations in California, beekeeping in Oregon, and making herbal crafts for local farmers markets in New Jersey, she has a wide variety of experiences and knowledge to share. Her passions include preserving food, gardening, practicing herbal wellness, making DIY skin and body care recipes, and living a lifestyle of minimal impact on the Earth.


WELCOME

We offer one of the most thorough selections of certified organic herbs, spices, and botanical products and are commited to responsible sourcing.

Savoring The Tradition Of Homemade Sauerkraut

Jars of colorful homemade sauerkraut with ingredients around them

Preserving food is so much more than extending the year’s harvest. It’s a way to connect with the practices of our ancestors. No matter what part(s) of the world your cultural lineage descends from, your relatives preserved food in one way or another. As we begin to transition into the colder months, I channel that knowledge and dream of how my pantry will evolve throughout the harvest. As the cabbages in my humble garden begin to peak, I get excited thinking of all of the different flavors of sauerkraut I can create.

Sauerkraut is a staple in my household. One of my favorite things about making this veggie ferment is that it’s an art form each and every time. There are endless possibilities of flavor combinations, and the only limit is one’s imagination. While there is a lot of room for intuition and culinary expression, there are also some guiding principles that will help ensure successful fermentation.

Tips for Making Sauerkraut at Home

  • Start with clean tools and hands. Be sure if you are going to massage your cabbage by hand, that you clean your nail beds very well.
  • Use only pure and unrefined salts.
  • Use organic vegetables and spices to keep your ferments free from synthetic chemicals.
  • Optimal fermentation temperature occurs at 62-72 degrees Fahrenheit.
  • Ensure the brine is completely covering your vegetables throughout the entire process.
  • Green cabbage makes more brine whereas red cabbage has a firmer texture. I like to mix and match to achieve the best of both worlds.
  • If you need additional brine, combine 2 cups of warm water with 1 tablespoon of salt. Let it cool before adding to your kraut.
  • It is normal to have a white film on top during fermentation. Simply scrape it off and allow it to continue working its magic.

There are two traditional herb-filled recipes that I have shared below to get you started. I hope you enjoy this year’s harvest!

Ingredients for Red Alaea Sauerkraut including bowl of juniper berries and jar of colored cabbage

Red Alaea Kraut Recipe

Yields ½ Gallon

Ingredients:

Directions: see below

Glass jar of seeded sauerkraut with caraway seeds and mustard seeds with napkin and fork

Traditional Seeded Kraut Recipe

Yields ½ Gallon

Ingredients:

Directions: see below

Hands using wooden pestle to massage cabbage to make sauerkraut in a glass jar

How To Make Homemade Sauerkraut

These directions apply to both of the recipes listed above.

  1. Chop all of your vegetables into pieces slightly larger than the desired size of your kraut.
  2. Begin massaging the cabbage while adding the salt, a little at a time. The salt coupled with the massaging will help release the natural water content of the cabbage to create your brine. If you want your cabbage to maintain a slightly firm texture, don’t overdo it with the massaging.
  3. Once you have a nice brine going, you can add in your other veggies to get them coated with brine. Unless you want them fully blended into the kraut, do not massage them.
  4. Add your spices and mix evenly. Some say adding spices can slow down mold growth in the kraut, making for a more consistent ferment.
  5. Using your clean hands or a "pickle packer" press the mixture tightly into clean glass jars or a fermentation crock. Ensure your veggies are completely covered with brine. (You can use a fermentation weight to hold down the veggies down or check on it daily and push the cabbage to submerge it in the brine.)
  6. Secure a plastic lid or a metal lid with parchment paper underneath to prevent corrosion. Store in a dark place for 1-3 weeks. The longer you ferment, the more beneficial bacteria there will be. Also, keep in mind that the longer the ferment, the more sour the flavor. Crack the lid every few days to allow the CO2 to escape.
  7. Once it's fermented to your liking, store in a refrigerator or cool, dark, dry space. You can separate into smaller jars for everyday use. Sauerkraut can be stored in the fridge for a very long time; I have never had it spoil after preservation.  
  8. Enjoy with family and friends!

WANT TO MAKE SURE YOU GET YOUR KRAUT "JUST RIGHT?"

Download Our Kraut Troubleshooting PDF

You May Also Like


Topics: Culinary, Recipes

Jessicka

Written by Jessicka on October 16, 2017

Jessicka Nebesni is the Senior Marketing Strategist and Herbal Liason for Mountain Rose Herbs. She is always working towards sharing the most educational, empowering, and useful resources with the Mountain Rose Herbs community. Having practiced Macrobiotic food preparations in California, beekeeping in Oregon, and making herbal crafts for local farmers markets in New Jersey, she has a wide variety of experiences and knowledge to share. Her passions include preserving food, gardening, practicing herbal wellness, making DIY skin and body care recipes, and living a lifestyle of minimal impact on the Earth.