Camping Food for Foodies: No Refrigeration Required

Vegetarian and gluten-free camping food

I Googled my symptoms. Turned out I just needed to go camping.

Sometimes the only cure for what ails me is getting away from civilization for a few days, someplace where there is no wifi, I can see a whole sky full of stars, and I can’t hear anything but a river and birds. Whether I’m hiking, backpacking, or car camping, cooler-space is either nonexistent or at a premium, so I appreciate delicious, no-refrigeration-required camping food options. The following three recipes are regulars on my family’s camping season menus. Not only are they delicious, they also happen to be gluten-free and vegan-optional. Enjoy!

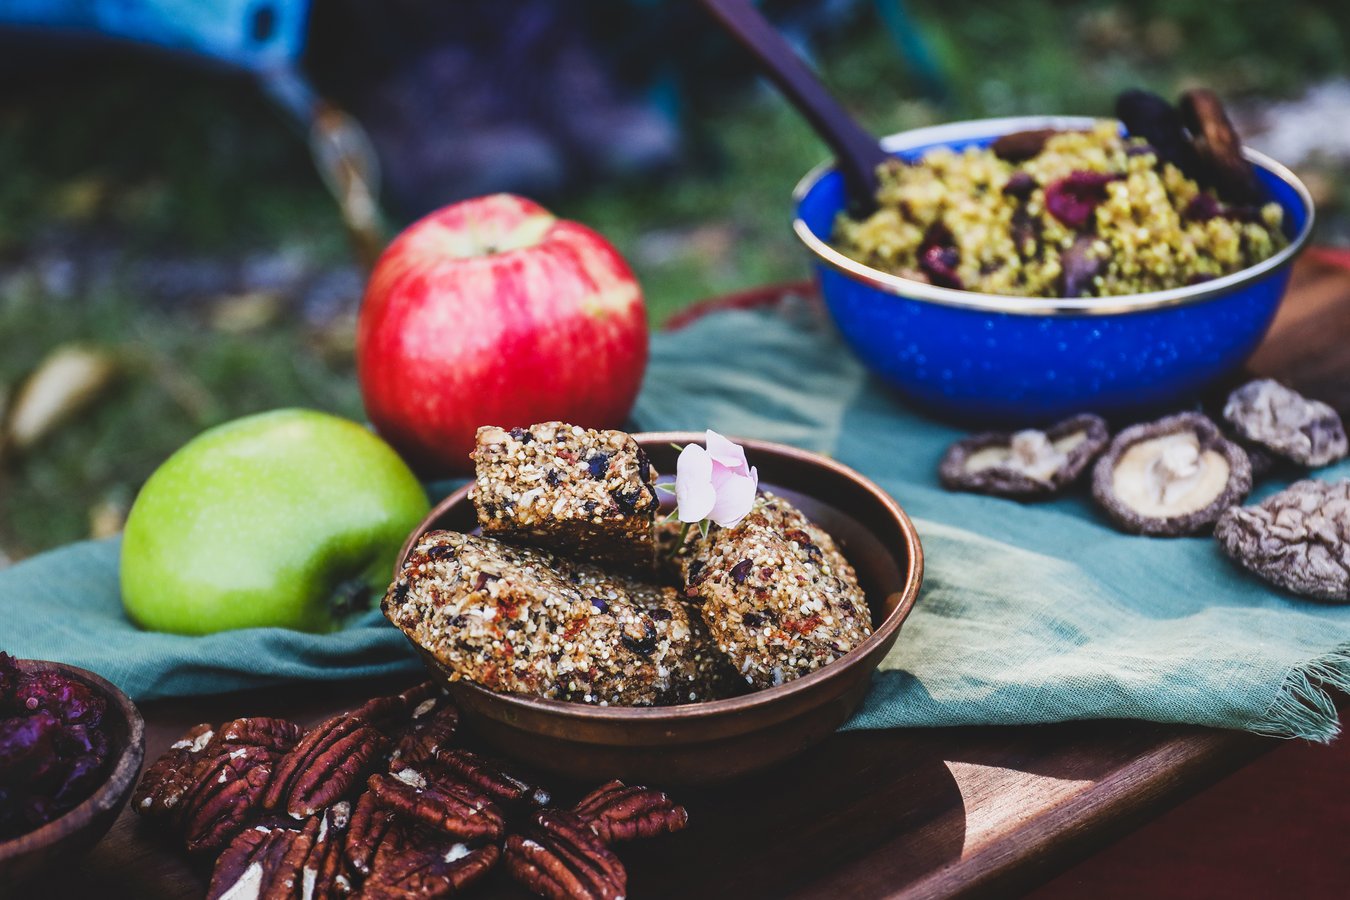
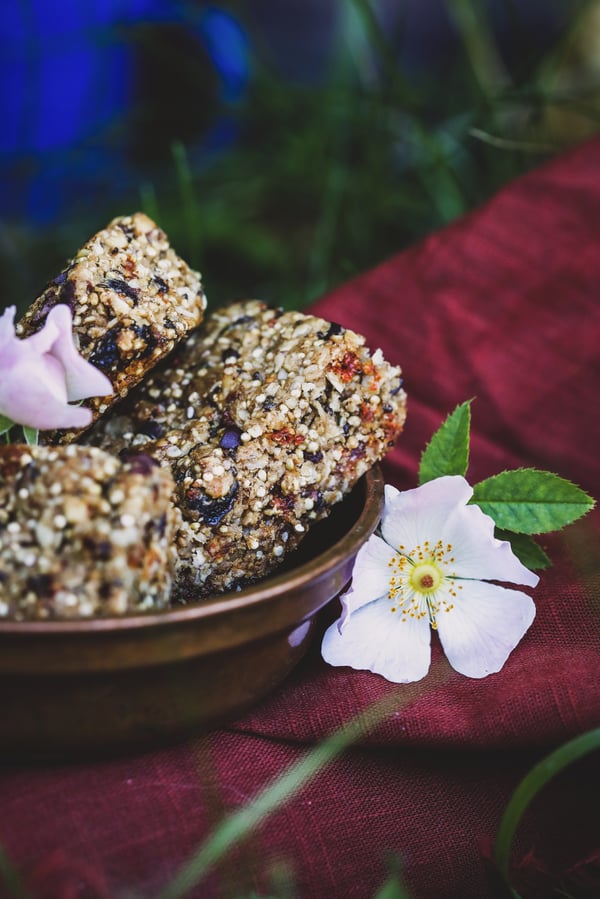
Homemade three-berry cacao energy bars


Three-Berry Cacao Energy Bars

Makes enough to fill one 8x8 baking dish. 

We keep these bars around all the time at my house. They’re handy to grab on the way out the door when you’re in a hurry, they’re perfect to bring along in the car for the kids, and they offer a good boost of protein and energy when you’re feeling that mid-afternoon slump. They also really shine for day-hikes and backpacking.

Ingredients

Directions

  1. Preheat oven to 350°F.
  2. Spread oats and quinoa on half a cookie sheet and the nuts on the other half. Bake until nicely scented and beginning to brown, about 8 minutes. Set aside until cool enough to handle.
  3. Place the nuts in the bowl of a food processor and pulse until just chopped. Don’t over-blend at this stage because we’re not done yet.
  4. Add the oats and quinoa to the food processor bowl and pulse 2-4 times, just to break down the size of the oats and nuts a little bit for a better bar consistency. Don’t over-blend; you want to keep some good texture. Pour mixture into a bowl. 
  5. Chop the goji berries to make them smaller—you should end up with about 1/4 cup chopped berries. Add to the bowl with the oat mixture.
  6. Add cranberries, currants, coconut flakes, hemp seeds, chia seeds, oat or almond flour, and cacao nibs and stir to thoroughly combine. Set aside.
  7. Put sunflower seed or nut butter, maple syrup, honey, oil, and salt in a small saucepan over medium-low heat. Stir together just until melted and creamy, 1-2 minutes. Don’t overcook or it will start to candy.
  8. Pour mixture over oat mixture in bowl and use a good wooden spoon to combine. The dough will be very thick and you may have to put a little muscle into it to get the dry ingredients completely incorporated.
  9. Line an 8-inch square baking dish with parchment paper. Very lightly brush the paper with oil.
  10. Scoop oat mixture on top. Press to evenly fill pan and flatten top. 
  11. Bake until lightly browned, 15-20 minutes.
  12. Cool completely in pan on cooling rack.
  13. Cut to preferred size bars.
  14. Store in airtight container at room temperature for up to a week. Freeze for long-term freshness.

Pro Tips

  • As long as you keep the proportions the same, you can trade ingredients in these bars to suit your palate. For instance, Im not a big fan of nut butters, so I always use sunflower seed butter, but your favorite nut butter will work great as long as it doesn’t have too much added sugar. You can trade the berries for any dried fruit you like, the cacao nibs for mini chocolate chips, etc. Also consider adding pinches of spices like cinnamon or pumpkin pie spice.
  • If you substitute brown rice syrup for the honey, you may want to lower the quantity. I find it to be particularly sweet, so I start with half the quantity of the honey and double the maple syrup. Just my two cents—please experiment and let me know what you like.

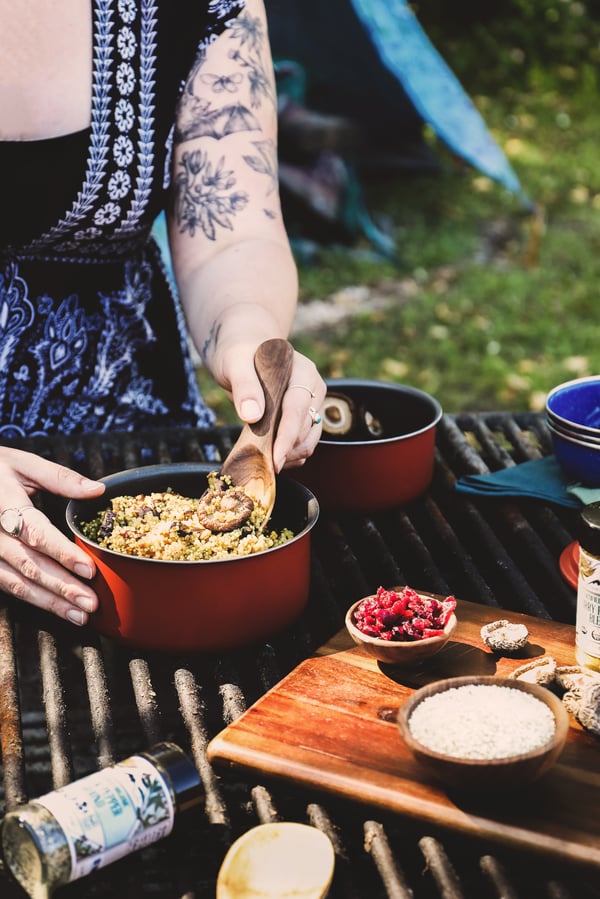
Gluten Free Camping Quinoa


Curried Quinoa with Shiitakes and Cranberries

Makes about 1 1/2 cups.

We make this tasty curried quinoa at home as a winter side dish. To transform it into a light summer dinner, we nest grilled proteins on top and seasonal fruits or veggies on the side. Happily, it’s also a really easy dish for backpacking and camping and it takes up very little room in your pack or camp food box. I learned to give dried shiitakes a long soak from one of my favorite cookbook authors, Andrea Nguyen. This method is camp-friendly and gives dried mushrooms wonderful flavor and texture!

Ingredients

Directions

At Home

    1. Stir together the dried onion, garlic granules, curry powder, and 1/4 tsp. each salt and pepper. Put in a small reusable/upcycled zip-style bag, roll to push out air, and seal. (Remember to also bring extra salt and pepper for all your camp cooking.)
    2. Put dried shiitake mushroom caps without stems in another zip-style bag, roll, and seal. (Put the stems back in your home stash for a different purpose.)
    3. Measure cranberries into another zip-style bag, roll, and seal.
    4. Measure quinoa into another zip-style bag, roll, and seal.
    5. Put all the little bags into a larger bag, push out the air, and seal so you have a compressed package.
    6. Put olive oil into a small no-leak container that is easy to pack.

At Camp

  1. 8-12 hours before cooking, put the mushroom caps in your cook-pot or a bowl that you can cover. If you’re planning this dish for dinner, do this first thing in the morning. 
  2. Add a good amount of clean water—the water temperature doesn’t matter, there’s no need to have hot water for a long soak. Use a spoon or your hands to “tumble” the mushrooms around in the water a bit to thoroughly wet them. Then turn the mushrooms right side up so the gills are pointing down. Cover the pot or bowl, set aside, and go about your day.
  3. When ready to cook, scoop out about 1/4 cup of the mushroom soaking water, or to taste, and set aside. Discard the remaining mushroom water or use in another dish.
  4. Rinse the soaked mushrooms to remove any potential grit caught in the gills. Gently squeeze to remove excess soaking water, then pat dry. Roughly chop. Set aside.
  5. Put 2 Tbsp. reserved mushroom soaking water in a vessel and add enough fresh water to equal one cup liquid. Pour into cook-pot.
  6. Add cranberries, cover pot, and bring to a boil.
  7. Once boiling, add the remaining 2 Tbsp. reserved mushroom soaking water, chopped shiitakes, quinoa, olive oil, and pre-blended spice mix.
  8. Lower heat, put on lid, and simmer about 10-12 minutes, until quinoa soaks up the liquid.
  9. Remove from heat and set aside, still covered, for another 10 minutes.
  10. Fluff with a fork.
  11. Adjust salt and pepper to taste and fluff again.
  12. Set aside for a few minutes to cool slightly and to give flavors a moment more to meld.

Pro Tips

  1. If you are sharing your campsite with wildlife that is adept at campground robbery, put the covered mushroom-soaking pot in a secure tent, vehicle, camp box, etc. for the long soak where it is safe from curious paws, claws, beaks, and the messes they make. I speak from experience.
  2. If you don’t have 8-12 hours, you can cut the dried mushroom caps in half or thirds before soaking to speed things up. You can also use hot water. 
  3. If you are backpacking at higher elevations, you may need a little more water to fully cook the quinoa.
  4. Adding a little mushroom soaking water to the cooking water gives the quinoa a nice umami boost, but don’t get tempted to use too much or it can overwhelm the whole dish.

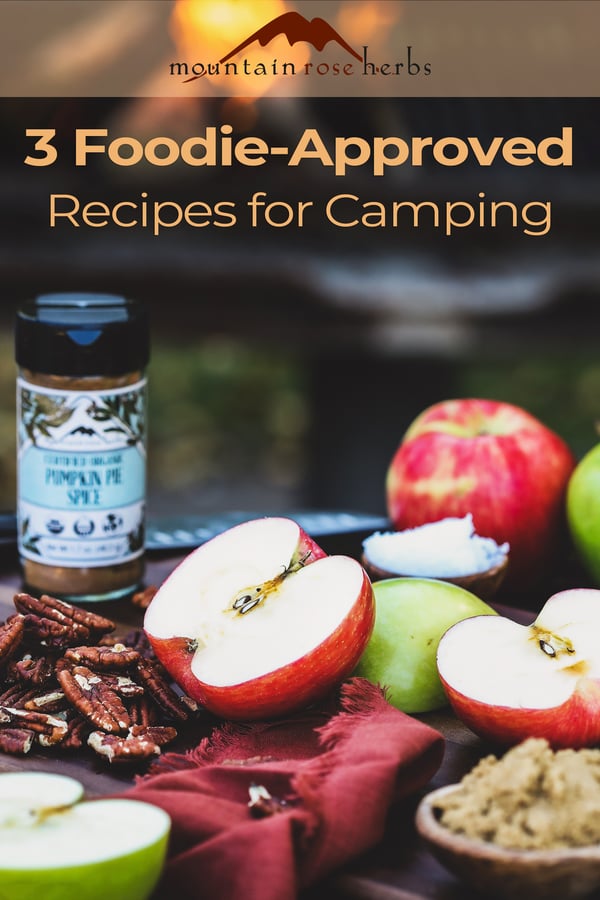
Apples, pecans, and pumpkin pie spice laid out in preparation for making campfire apples.

Campfire Apples

Makes 2 apples.

This recipe is a classic that some of us might remember from scout camps. It’s got a little bit of a learning curve to figure out the right spot in the coals, but once you understand the physics, this is a particularly satisfying campfire cooking experience. For car camping, my family loves to do these in a little cast iron dutch oven over the coals of a campfire, but that’s not practical for backpacking and we don’t always want to find room in the car for a heavy pot, so cooking in foil is a space-saving option. You can also use this method above the leftover briquette coals in your barbecue after grilling if you dont have a campfire. A good pair of tongs are handy for this recipe, but you can use sticks and hot-pads in a pinch.

I line the aluminum foil with parchment paper, which acts as a barrier between the apples and the foil (for those of us concerned about introducing more aluminum in our diets) and also makes clean up easier and re-use of the foil for a future campfire more likely.

Ingredients 

  • 2 Tbsp. organic brown sugar
  • 1/2 tsp. pumpkin pie spice or cinnamon
  • 1/8 tsp. fine sea salt
  • 1 Tbsp. currants or chopped cranberries or raisins
  • 1 Tbsp. chopped organic pecans, walnuts, or other nuts of choice
  • 1 Tbsp. organic butter or butter substitute like organic coconut oil
  • 2 large organic, firm, pie-type apples (Granny Smith, Honeycrisp, Braeburn, etc.)
Directions
  1. At Home

    1. In a small, sealable, airtight container, combine brown sugar, pumpkin pie spice or cinnamon, and salt.
    2. In a separate sealable container, combine dried fruit and chopped nuts.
    3. Store butter or coconut oil in another small, sealable container.
    4. Pre-measure and cut four heavy-duty foil pieces large enough to thoroughly wrap an apple and to seal well. 
    5. Lay two tinfoil pieces one on top of the other to make a double layer. Repeat with remaining tinfoil pieces to make a second double layer.
    6. Cut two squares of parchment paper large enough to thoroughly wrap an apple, but smaller than the foil pieces (you don’t want the parchment to touch the fire, so it needs to seal inside the foil).
    7. Lay one parchment square on top of each of the double layer of foil. Fold each stack into easily-packable sizes.
    8. Pack apples carefully to avoid bruising

At Camp

  1. Using your fingers, mix together softened butter or coconut oil with the pre-mixed brown sugar, spice, and salt blend.
  2. Mix in cranberry-nut blend to thoroughly coat. Set aside.
  3. Either core the apples, leaving the bottoms intact, or cut the apple in half from stem to bottom and slice out the core to make a trench in each half.
  4. If you cored the apple, peel a stripe around the middle circumference. This helps it cook more evenly. You don’t need to do this if you cut the apple in half.
  5. Place an apple on each stack of tinfoil pieces. If you cored the apple, set it right side up. If you halved the apples, set the two halves cut-side up.
  6. Divide the butter-sugar mixture equally between the apples. Push into the core hole or into each of the trenches you created in the halved, cored apples. If you halved the apples, press them back together again, squishing the filling as necessary to create a whole apple.
  7. Wrap each apple securely in the parchment-lined squares of foil, being sure to keep the parchment inside the foil around the apple. Secure the foil well so it doesn’t open in cooking, but also leave a little room in the package for heat expansion. If you cored the apples, mark the top so you know which way is up when you unwrap them later.
  8. When your campfire coals or briquettes have died down some, you want to tuck the foil-wrapped apples near the coals so they have coals around them but are not directly on or under piping hot coals. The outer edges of the fire are usually the best spots, away from the red-hot center. The goal is to cook the apples slowly, about 20-30 minutes. Alternatively, if you have a grate above your campfire, you can put the wrapped apples on the grate directly above the heat.
  9. Using long tongs or sticks, turn the foil packages every 5-10 minutes for even cooking. You’ll know they are done when you squeeze the foil package with tongs or hot-pads and they are very soft but not yet mushy.
  10. Remove from fire.
  11. Be careful of hot sugar when unwrapping!

Pro Tips

  1. If you use smaller apples, you will need to adjust both the quantity of the filling and the cooking time. 
  2. If your apples are cooking too fast or the coals are still too hot, you can move the foil-wrapped apples out of the coals into the ash right around the fire or up on top of a grate over the fire ring to slow down the process or keep them warm. Keep turning them as necessary.


Want more camping hints?

Try these Zero Waste Backpacking and Camping Hacks!


You may also enjoy:

Camping Food for Foodies: No Refrigeration Required Pinterest pin for Mountain Rose Herbs


Topics: Culinary, Recipes

Heidi

Written by Heidi on June 30, 2022

Heidi is an award winning freelance writer with a passion for urban homesteading. She has been honored to receive a number of literary prizes including the esteemed Pushcart Prize and an Individual Artists Award in Creative Writing from the Oregon Arts Commission and the National Endowment for the Arts. When she isn’t working in the garden, cleaning the henhouse, preserving food, crafting herbal formulations, or writing and editing content for really fantastic small businesses, you’ll likely find her with her nose in a book.


WELCOME

We offer one of the most thorough selections of certified organic herbs, spices, and botanical products and are commited to responsible sourcing.

Camping Food for Foodies: No Refrigeration Required

Vegetarian and gluten-free camping food

I Googled my symptoms. Turned out I just needed to go camping.

Sometimes the only cure for what ails me is getting away from civilization for a few days, someplace where there is no wifi, I can see a whole sky full of stars, and I can’t hear anything but a river and birds. Whether I’m hiking, backpacking, or car camping, cooler-space is either nonexistent or at a premium, so I appreciate delicious, no-refrigeration-required camping food options. The following three recipes are regulars on my family’s camping season menus. Not only are they delicious, they also happen to be gluten-free and vegan-optional. Enjoy!

Homemade three-berry cacao energy bars


Three-Berry Cacao Energy Bars

Makes enough to fill one 8x8 baking dish. 

We keep these bars around all the time at my house. They’re handy to grab on the way out the door when you’re in a hurry, they’re perfect to bring along in the car for the kids, and they offer a good boost of protein and energy when you’re feeling that mid-afternoon slump. They also really shine for day-hikes and backpacking.

Ingredients

Directions

  1. Preheat oven to 350°F.
  2. Spread oats and quinoa on half a cookie sheet and the nuts on the other half. Bake until nicely scented and beginning to brown, about 8 minutes. Set aside until cool enough to handle.
  3. Place the nuts in the bowl of a food processor and pulse until just chopped. Don’t over-blend at this stage because we’re not done yet.
  4. Add the oats and quinoa to the food processor bowl and pulse 2-4 times, just to break down the size of the oats and nuts a little bit for a better bar consistency. Don’t over-blend; you want to keep some good texture. Pour mixture into a bowl. 
  5. Chop the goji berries to make them smaller—you should end up with about 1/4 cup chopped berries. Add to the bowl with the oat mixture.
  6. Add cranberries, currants, coconut flakes, hemp seeds, chia seeds, oat or almond flour, and cacao nibs and stir to thoroughly combine. Set aside.
  7. Put sunflower seed or nut butter, maple syrup, honey, oil, and salt in a small saucepan over medium-low heat. Stir together just until melted and creamy, 1-2 minutes. Don’t overcook or it will start to candy.
  8. Pour mixture over oat mixture in bowl and use a good wooden spoon to combine. The dough will be very thick and you may have to put a little muscle into it to get the dry ingredients completely incorporated.
  9. Line an 8-inch square baking dish with parchment paper. Very lightly brush the paper with oil.
  10. Scoop oat mixture on top. Press to evenly fill pan and flatten top. 
  11. Bake until lightly browned, 15-20 minutes.
  12. Cool completely in pan on cooling rack.
  13. Cut to preferred size bars.
  14. Store in airtight container at room temperature for up to a week. Freeze for long-term freshness.

Pro Tips

  • As long as you keep the proportions the same, you can trade ingredients in these bars to suit your palate. For instance, Im not a big fan of nut butters, so I always use sunflower seed butter, but your favorite nut butter will work great as long as it doesn’t have too much added sugar. You can trade the berries for any dried fruit you like, the cacao nibs for mini chocolate chips, etc. Also consider adding pinches of spices like cinnamon or pumpkin pie spice.
  • If you substitute brown rice syrup for the honey, you may want to lower the quantity. I find it to be particularly sweet, so I start with half the quantity of the honey and double the maple syrup. Just my two cents—please experiment and let me know what you like.

Gluten Free Camping Quinoa


Curried Quinoa with Shiitakes and Cranberries

Makes about 1 1/2 cups.

We make this tasty curried quinoa at home as a winter side dish. To transform it into a light summer dinner, we nest grilled proteins on top and seasonal fruits or veggies on the side. Happily, it’s also a really easy dish for backpacking and camping and it takes up very little room in your pack or camp food box. I learned to give dried shiitakes a long soak from one of my favorite cookbook authors, Andrea Nguyen. This method is camp-friendly and gives dried mushrooms wonderful flavor and texture!

Ingredients

Directions

At Home

    1. Stir together the dried onion, garlic granules, curry powder, and 1/4 tsp. each salt and pepper. Put in a small reusable/upcycled zip-style bag, roll to push out air, and seal. (Remember to also bring extra salt and pepper for all your camp cooking.)
    2. Put dried shiitake mushroom caps without stems in another zip-style bag, roll, and seal. (Put the stems back in your home stash for a different purpose.)
    3. Measure cranberries into another zip-style bag, roll, and seal.
    4. Measure quinoa into another zip-style bag, roll, and seal.
    5. Put all the little bags into a larger bag, push out the air, and seal so you have a compressed package.
    6. Put olive oil into a small no-leak container that is easy to pack.

At Camp

  1. 8-12 hours before cooking, put the mushroom caps in your cook-pot or a bowl that you can cover. If you’re planning this dish for dinner, do this first thing in the morning. 
  2. Add a good amount of clean water—the water temperature doesn’t matter, there’s no need to have hot water for a long soak. Use a spoon or your hands to “tumble” the mushrooms around in the water a bit to thoroughly wet them. Then turn the mushrooms right side up so the gills are pointing down. Cover the pot or bowl, set aside, and go about your day.
  3. When ready to cook, scoop out about 1/4 cup of the mushroom soaking water, or to taste, and set aside. Discard the remaining mushroom water or use in another dish.
  4. Rinse the soaked mushrooms to remove any potential grit caught in the gills. Gently squeeze to remove excess soaking water, then pat dry. Roughly chop. Set aside.
  5. Put 2 Tbsp. reserved mushroom soaking water in a vessel and add enough fresh water to equal one cup liquid. Pour into cook-pot.
  6. Add cranberries, cover pot, and bring to a boil.
  7. Once boiling, add the remaining 2 Tbsp. reserved mushroom soaking water, chopped shiitakes, quinoa, olive oil, and pre-blended spice mix.
  8. Lower heat, put on lid, and simmer about 10-12 minutes, until quinoa soaks up the liquid.
  9. Remove from heat and set aside, still covered, for another 10 minutes.
  10. Fluff with a fork.
  11. Adjust salt and pepper to taste and fluff again.
  12. Set aside for a few minutes to cool slightly and to give flavors a moment more to meld.

Pro Tips

  1. If you are sharing your campsite with wildlife that is adept at campground robbery, put the covered mushroom-soaking pot in a secure tent, vehicle, camp box, etc. for the long soak where it is safe from curious paws, claws, beaks, and the messes they make. I speak from experience.
  2. If you don’t have 8-12 hours, you can cut the dried mushroom caps in half or thirds before soaking to speed things up. You can also use hot water. 
  3. If you are backpacking at higher elevations, you may need a little more water to fully cook the quinoa.
  4. Adding a little mushroom soaking water to the cooking water gives the quinoa a nice umami boost, but don’t get tempted to use too much or it can overwhelm the whole dish.

Apples, pecans, and pumpkin pie spice laid out in preparation for making campfire apples.

Campfire Apples

Makes 2 apples.

This recipe is a classic that some of us might remember from scout camps. It’s got a little bit of a learning curve to figure out the right spot in the coals, but once you understand the physics, this is a particularly satisfying campfire cooking experience. For car camping, my family loves to do these in a little cast iron dutch oven over the coals of a campfire, but that’s not practical for backpacking and we don’t always want to find room in the car for a heavy pot, so cooking in foil is a space-saving option. You can also use this method above the leftover briquette coals in your barbecue after grilling if you dont have a campfire. A good pair of tongs are handy for this recipe, but you can use sticks and hot-pads in a pinch.

I line the aluminum foil with parchment paper, which acts as a barrier between the apples and the foil (for those of us concerned about introducing more aluminum in our diets) and also makes clean up easier and re-use of the foil for a future campfire more likely.

Ingredients 

  • 2 Tbsp. organic brown sugar
  • 1/2 tsp. pumpkin pie spice or cinnamon
  • 1/8 tsp. fine sea salt
  • 1 Tbsp. currants or chopped cranberries or raisins
  • 1 Tbsp. chopped organic pecans, walnuts, or other nuts of choice
  • 1 Tbsp. organic butter or butter substitute like organic coconut oil
  • 2 large organic, firm, pie-type apples (Granny Smith, Honeycrisp, Braeburn, etc.)
Directions
  1. At Home

    1. In a small, sealable, airtight container, combine brown sugar, pumpkin pie spice or cinnamon, and salt.
    2. In a separate sealable container, combine dried fruit and chopped nuts.
    3. Store butter or coconut oil in another small, sealable container.
    4. Pre-measure and cut four heavy-duty foil pieces large enough to thoroughly wrap an apple and to seal well. 
    5. Lay two tinfoil pieces one on top of the other to make a double layer. Repeat with remaining tinfoil pieces to make a second double layer.
    6. Cut two squares of parchment paper large enough to thoroughly wrap an apple, but smaller than the foil pieces (you don’t want the parchment to touch the fire, so it needs to seal inside the foil).
    7. Lay one parchment square on top of each of the double layer of foil. Fold each stack into easily-packable sizes.
    8. Pack apples carefully to avoid bruising

At Camp

  1. Using your fingers, mix together softened butter or coconut oil with the pre-mixed brown sugar, spice, and salt blend.
  2. Mix in cranberry-nut blend to thoroughly coat. Set aside.
  3. Either core the apples, leaving the bottoms intact, or cut the apple in half from stem to bottom and slice out the core to make a trench in each half.
  4. If you cored the apple, peel a stripe around the middle circumference. This helps it cook more evenly. You don’t need to do this if you cut the apple in half.
  5. Place an apple on each stack of tinfoil pieces. If you cored the apple, set it right side up. If you halved the apples, set the two halves cut-side up.
  6. Divide the butter-sugar mixture equally between the apples. Push into the core hole or into each of the trenches you created in the halved, cored apples. If you halved the apples, press them back together again, squishing the filling as necessary to create a whole apple.
  7. Wrap each apple securely in the parchment-lined squares of foil, being sure to keep the parchment inside the foil around the apple. Secure the foil well so it doesn’t open in cooking, but also leave a little room in the package for heat expansion. If you cored the apples, mark the top so you know which way is up when you unwrap them later.
  8. When your campfire coals or briquettes have died down some, you want to tuck the foil-wrapped apples near the coals so they have coals around them but are not directly on or under piping hot coals. The outer edges of the fire are usually the best spots, away from the red-hot center. The goal is to cook the apples slowly, about 20-30 minutes. Alternatively, if you have a grate above your campfire, you can put the wrapped apples on the grate directly above the heat.
  9. Using long tongs or sticks, turn the foil packages every 5-10 minutes for even cooking. You’ll know they are done when you squeeze the foil package with tongs or hot-pads and they are very soft but not yet mushy.
  10. Remove from fire.
  11. Be careful of hot sugar when unwrapping!

Pro Tips

  1. If you use smaller apples, you will need to adjust both the quantity of the filling and the cooking time. 
  2. If your apples are cooking too fast or the coals are still too hot, you can move the foil-wrapped apples out of the coals into the ash right around the fire or up on top of a grate over the fire ring to slow down the process or keep them warm. Keep turning them as necessary.


Want more camping hints?

Try these Zero Waste Backpacking and Camping Hacks!


You may also enjoy:

Camping Food for Foodies: No Refrigeration Required Pinterest pin for Mountain Rose Herbs


Topics: Culinary, Recipes

Heidi

Written by Heidi on June 30, 2022

Heidi is an award winning freelance writer with a passion for urban homesteading. She has been honored to receive a number of literary prizes including the esteemed Pushcart Prize and an Individual Artists Award in Creative Writing from the Oregon Arts Commission and the National Endowment for the Arts. When she isn’t working in the garden, cleaning the henhouse, preserving food, crafting herbal formulations, or writing and editing content for really fantastic small businesses, you’ll likely find her with her nose in a book.